Sunday, March 31, 2013

Is Yiros. Is Good!

I love a hamburger, I love a doner kebab. But nothing beats a yiros. And the fact that it’s so easy to make at home says it all. Simple ingredients, simply combined.

Pita bread is softer than lebanese bread, and much softer than lavash. This makes it perfect for warming on the grill without becoming brittle.

When ordering the lamb, I ask my butcher to debone and butterfly the leg. If done well, you get a single piece of lamb, one side with a layer of fat, one side lean, and of fairly even thickness. If that’s not what you get, find another butcher (or ask more explicitly next time, as I’ve often found that butchers and other artisans like being asked to show off their skills, rather than all day serving up standard cuts). Ask for the bones too, and place in your stock bag in your freezer.

But it's not so difficult, and kind of fun, to do it yourself, so I've included a youtube how-to video at the bottom of this post.

For a single meal for me and my boys (say 2 or 3 yiros each) this leaves enough tasty lamb for a couple lunches and another meal at least.

Recipe: Yiros

Ingredients

Lamb

  • 1 leg of lamb, boned and butterflied
  • 2 tablespoons dried oregano
  • 2 cloves garlic, crushed
  • 2 tablespoons olive oil
  • 2 lemons, juiced

Yogurt sauce

  • 1 cup Greek style yogurt
  • 2 cloves garlic
  • 1 lemon juiced
  • 1 teaspoon ground cumin

Other accompaniments

  • 3 tomatoes
  • .5 iceberg lettuce
  • 2 onions

Method

Lamb

Combine oil, lemon juice, crushed garlic and oregano.

Place lamb in a baking dish or similar, and rub marinade over the surface of the lamb, making sure the surface is well covered. Cover and refrigerate overnight or for 2 hours at least.

Yogurt sauce

The yogurt sauce can be done and kept overnight too, as the flavours develop over time.

Greek style yogurt is creamy and smooth. If using regular yogurt, it’s best to hang it overnight in cheese cloth. Even Greek yogurt can be strained in this way for an hour our two, which will give it more room to accommodate the lemon juice and retain its creamy consistency.

Crush garlic, and stir through yogurt with cumin.

Accompaniments

Finely slice tomatoes and lettuce Finely slice onions and soak in lemon juice

Pita bread

Heat your bbq plate (or frying pan) to medium heat. Brush pita bread with olive oil. Place oiled side onto cooking surface. When the underside is browned and ready, quickly bush the upside and flip. Do this one, two or three at a time depending on how big the cooking surface is, and keep warm.

Lamb continued

Bring BBQ grill to high heat and place lamb fat side down for five minutes. Turn and cook for another five. Drop heat to low for another five. Remove from heat and let rest, covered, for ten.

Assembly

Now it’s assembly time!

I like having squares of grease-proof paper (get it?) or white paper bags on hand, because the kids love it, and it feels normal.

Brush the pita bread with the garlic and yogurt sauce. Kids may prefer supermarket tomato or or bbq sauce, but if you add a little of the white stuff, they might not notice - and the journey has begun!

Slice the lamb into thin slices and add, along with sliced tomatoes, shredded lettuce, and onions.

Roll ’em. Eat ’em. Is yiros. Is yum!

How to butterfly a leg of lamb

Friday, March 29, 2013

Israeli eggs

Shakshuka is the Israeli variant of a common Mid-Eastern/North African dish, popular as a breakfast, but versatile enough for any meal.

It is basically - eggs poached over a spicy tomato salsa. Simple and tasty, but with something extra that lifts it above the ordinary.

If you’re looking for a main meal version try, as I did, adding a bed of couscous, as well as crumbling in feta and adding sliced mushrooms. Sliced chorizo is nice to add also, but this plays merry hell with its Kosherness! Finely chopped red and yellow capsicum can also be added to the onion and garlic at the beginning. All good!

Recipe - Shakshuka

Ingredients

  • 1 onion
  • 2 cloves garlic
  • 2 cups tomato salsa
  • 2 tomatoes
  • 4 eggs
  • 1 teaspoon ground cumin
  • 1 teaspoon paprika
  • 1 teaspoon cayenne pepper
  • 2 cups couscous
  • 2 cups water
  • 2 tablespoons olive oil
  • Sprigs parsley or coriander to garnish

Method

  • Chop garlic and onion and, in a heavy based frying pan, sauté in olive oil over medium heat
  • Chop tomatoes
  • Once the onion turns transparent and begins to brown, stir in cumin, cayenne and paprika
  • Add chopped tomatoes, simmer for 5 minutes. Add tomato salsa and simmer for another 10. Add salt and pepper to taste
  • Place couscous in a bowl. Boil the water, and pour over couscous. Cover and let stand for 5 minutes
  • Break eggs, evenly spaced, onto the simmering tomato mixture in the pan. Once the eggs are poached the way you like it (you might want to pot them under the griller to finish them off), they are ready to serve
  • Serve on a bed of couscous, garnish with parsley or coriander

Saturday, February 23, 2013

Simon and Garfunkel Rillon

Locked in on a rainy day, I’m laying the foundation for a week’s work of bachelor food. Chicken stock, beef fajitas, and pork belly rillon.
This is a French dish which, done in the traditional way, is basically fat deep fried in fat.

I don’t do it this way. You want something to warm the cockles of your heart, not harden them.
This recipe is more based on the River Cottage one by English foodie Hugh Fearnley-Whittingstall, except: no lard, more herbs, and just one pot!

Pork belly rillon recipe

Like many a bachelor, I love the chilli. The cayenne is a familiar favourite. Included amongst the roast vegetables, it is a taste sensation. Dried cayenne, fried in good oil, is a blessing on the tongue. The caramelised flavours of the pork, garlic and chilli make this dish a BF favourite!


Ingredients

  • 1 kg boneless pork belly, with skin on
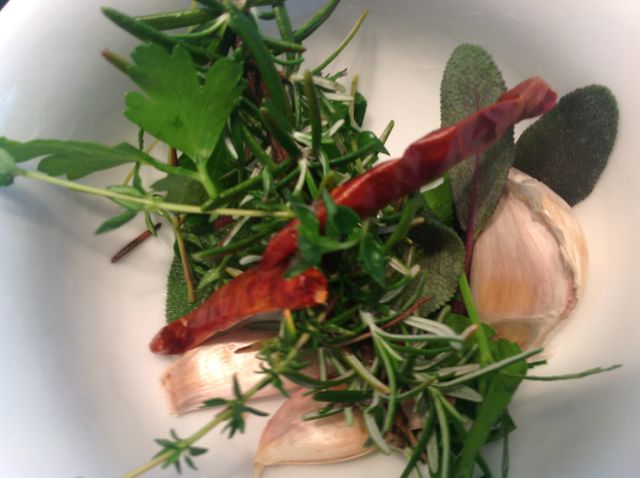
  • 3 cloves garlic
  • 3 dried cayenne chilies
  • 1 cup water
  • 1 cup red wine
  • Sprigs: parsley, sage, rosemary and thyme
  • Salt
  • Pepper
  • .25 cup olive oil

Method

  • Preheat oven to 200˚
  • Cut pork into large chunks - for a 1 kg piece, that would be 10 to 12 pieces
  • In a heavy based, oven proof pan or casserole dish, heat oil until it just begins to smoke
  • Add the chilies whole
  • Add pork chunks skin down, cooking 2–3 minutes on all sides so they get nice and brown
  • Cut the woody end of the garlic and crush with the flat of a kitchen knife
  • Strip the rosemary leaves off the woody stem, leaving the other sprigs whole
  • When pork is browned, toss in herbs and garlic, and season with salt and pepper
  • Add wine and water
  • Bring to a simmer
  • Turn the pork skin side down
  • Place pan in oven, turning the pork skin side up after 10 minutes
  • After another 10, drop heat to 150˚ and cook for 2 hours
Serve hot with steamed potato and veggies, or refrigerate for sandwiches or later re-heat and re-brand.
Tonight, I sliced the pork thinly, and stirred into steamed rice with fresh ginger, baby spinach leaves and dark soy sauce.

Sunday, January 27, 2013

Barbecue baked sardines with thyme and ginger

They will always be Greek to me - Σαρδέλες.

Sardines (Sartheles in Greek - also known as pilchards) are the seafood bargain of the century. They are a schooling fish, sustainably managed, and taste great. You can generally buy them for less than $10 a kilo. They are quick to clean and gut. And did I mention? They taste great!

Ingredients

  • 8 sardines (or 3–4 per person)
  • 2 cloves garlic, crushed
  • 1 tablespoon grated ginger
  • 1 lemon juiced
  • 1 lemon grated zest
  • 1 tablespoon olive oil
  • 1 sprig thyme plus 2 for garnish
  • 4 dried chilli

Method

  • Clean the sardines and place in a bowl or tray
  • Place one sprig of thyme in the cavity of each sardine
  • Mix the rest of the ingredients (except the last sprigs of thyme and the dried chilli) in a bowl
  • Pour mixture over sardines
  • Add chilli and extra thyme
  • Cover and place in refrigerator for 2 hours
Now, to cook, you can use your oven if you like, preheated to 200˚, but I use my barbecue.

Preheat your barbecue with all burners on and the hood down. While the barbecue is warming, take a roasting pan and coat it with olive oil. Place your sardines on the tray, and pour over the marinade juices.

We are using the convection method here, so turn off once side of the barbecue burners, and place your tray on the side that is turned off. Place the hood down, and cook for 20 minutes.

Serve with fresh tomatoes, homemade hummus, and Lebanese bread. I get my Leb bread from Baalbek on Canterbury Road because they make a wholemeal variety which is not heavy and stodgy as this can sometimes be.

A note on the grating of ginger


Nothing beats a bamboo ginger grater. You lay it down flat, and scrub the peeled ginger back and forth over it. No barked knuckles, and no waste, as you just give the grater a couple of taps and the chopping board, and all the ginger comes out nicely from between the grooves.

Friday, January 25, 2013

Barbecue salad!

A beautiful summer morning. 20˚ now, 30˚ later. Fire up the barbecue for a late lunch.

This includes a moral dilemma. I reserve the grill for meat and the plate for veggies out of courtesy to my veggie friends - but this time I want to cook bacon on the plate. WHAT CAN I DO?

I take out a baking tray and give a good dose of olive oil. This will sit on one side of the BBQ plate, leaving the other side to crisp up the bread.

Recipe: Barbecue salad with crispy bread, bacon, and 2-minute egg

Ingredients

  • Double handful English spinach
  • 1 ripe tomato
  • 1 rasher bacon
  • 1 piece Lebanese bread
  • 2 eggs
  • 8 Calamata olives
  • several sprigs basil and parsley

Method

Heat BBQ, placing oiled baking tray on the hot plate.

Place eggs in a saucepan of cold water. Bring to a steady boil, turn heat down to a gentle boil, and cook for 2 minutes. Place eggs in a bowl and refrigerate.

Using tongs, dip the piece of Lebanese bread into the oil, then place on the hot plate. About a minute each side. Remove to a plate.

Slice tomato in half, and place cut-side down on the tray. Lay out rasher of bacon on the tray. Cover with BBD hood. Turn each after 3–5 minutes.

Place tomato and bacon in the fridge with your eggs.

[Now it is time to get on with your morning. Go shopping, go for a cycle, take the kids to the pool, whatever]

Peel the eggs and slice them. They should be soft in the middle, but not runny.

Break off bits of the Lebanese bread and distribute evenly around a salad bowl. Toss in torn spinach leaves.

Cut tomato and bacon into small pieces, and add to bowl. Add olives. Garnish with basil and parsley.
I didn’t use a dressing on this, because I figured the tomato juices would do the job. And they did!

Tuesday, January 8, 2013

Missing, making, and bringing the bling

In the world of the contemporary bachelor father (ref not-so contemporary family sitcom of the same name), missing your children is inevitable.
For bachelor food, there are two main remedies. First is prepare something to set aside for their next stay (stock is a favourite). Second is to make something for yourself to give some bling to your interim meals.
On Sunday afternoon, out in the garden (such as it is), my eldest son remarked that the chilli and basil plants were getting a little heavy.
After saying goodbye to them (the children, not the chillies), I swung into action.

chilli and basil

Recipe: Chilli paste

This is an extremely tasty and versatile bit of bling. It's based on one I used to do about 15 years ago when, above the cooktop, I used to hang a sign "put the rice on now" because meals whipped up using this little gem were ready so quickly.

It works very well with poached fish, and fried with coconut cream as the basis of a stir-fry. Or you can just add it to stuff.

Ingredients

15–20 bird’s eye or tabasco chilies
1 large red capsicum
4 tablespoons cider vinegar
1 tablespoon peanut oil
1 teaspoon palm sugar
5 basil leaves
3 curry leaves
2 teaspoons salt

Method

Roast lightly oiled capsicum (preferably over a barbecue). Turn when skin begins to blacken and bubble. Once blackened on all sides, remove to a plastic bag, seal and set aside until cool enough to handle.
Roughly chop remaining solid ingredients, and place in blender with the vinegar, oil, salt and sugar
Remove capsicum, peel off the skin and remove seeds. Roughly chop, then place in the blender with the rest of the ingredients. Blend until smooth.
Remove to a small saucepan, bring to boil and simmer until mixture is reduced by about 1/3.
Place in a sterilised jar, seal and refrigerate.

mixed herb pesto

Recipe: Mixed herb pesto

Ingredients

3 big handfuls basil leaves
Several sprigs each: Sage, Parsley, Oregano
.25 cup almond slivers
1 clove garlic
Juice 1 lemon
4 tablespoons olive oil
1 tablespoon grated parmesan

Method

In a dry frying pan on medium to high heat, fry almond slivers until they are golden. Careful, once they start to go, they blacken quickly if you let them.
Once done, remove to a bowl. Now pop the unpeeled garlic clove into the pan and brown in on each side, so that it is soft and starting to caramelise in the middle. Then let it cool, and peel.
Put all the ingredients a little at a time into a blender, using enough oil to keep the contents churning. The amount of oil you need will vary according to the moisture content of the basil leaves.
Spoon into a sterilised jar, seal and refrigerate.

Wednesday, December 26, 2012

Butterfly for Christmas

Well, I had in mind a barbecue chicken for Christmas dinner once the boys were back from their big family lunch with their mother. Bummer that it was pouring rain, but not to fear, the oven will have to substitute.

What I’ve been thinking over since my last Portuguese chicken experience was what makes this style so different from regular barbecue bird. The obvious reason is that the chicken is butterflied, not whole.

Why butterfly

Because the chicken lays out flat, it can be barbecued direct on the grill, rather than through convection or rotated on a spit. It also cooks more quickly as a result. The downside can be that it can be dry if not prepared properly. This is what I found in my last Portuguese chicken experience, which made me think - “I can do better than this”.


Also, because you remove the chicken back, which generally gets tossed out uneaten when you cook the whole bird, this portion can be retained for later stock making. Just have a bag in the freezer, and once it’s full, it’s stock time! No waste. Good.

How butterfly

First, I always take out the wishbone, because the kids like the wish thing. This is easily removed by going to the neck end and isolating the bone with a small, sharp knife. The bone pops out easily.

Take a whole chicken and place it breast down on a chopping board.

Starting from the tail end, use kitchen shears to cut down one side, the full length of the spine. Then repeat down the other side. This should leave you with a four centimetre slab of backbone for your stock stockpile.

Flip the bird over and flatten out with the breast bone facing towards you. There’s a kind of coin-shaped piece of cartilage at the top of the breast bone. Slice it down the middle then remove it. This reveals the top of the breast bone. You can then follow the bone with your fingers under the thin membrane, all the way to the end and along the cartilage at the end of the bone. Do this on both sides, then lift out the breast bone. This is also called the keel bone, and now you can see why.

With the chicken still laid breast down, trim excess fat and skin flaps. Finally, clip off the wing tips. These are better used in the stock bag than being burnt on the barbecue.

Place flattened, skin side up, in an oven dish or something similar. Here's a YouTube video which shows the basics.

Two bad things about the vid is 1. Throwing out the stock bones 2. Cooking while wearing a ring.

The marinade


The marinade to butterflied chicken is what stuffing is to whole chicken. It keeps it moist and flavoursome.

My favourite is like this.

  • .25 cup olive oil
  • Juice of one lemon
  • Teaspoon salt
  • Tablespoon ground black pepper
  • Tablespoon smokey paprika

Mix this in a bowl, and apply to the chicken using a pastry brush, so that it’s generously covered. Keep the remainder of the marinade for later.

Cover the chicken and let it rest in the fridge for a least an hour.

Cooking


Preheat oven to 200 degrees C. Give the chicken another coat of marinade before placing in the oven. After 30 minutes, baste with marinade again. After another 30, repeat. Another 15, and it’s done.