Tuesday, December 11, 2012

Red and hot!

Last night I wasn’t feeling so hot (of course I was hot, I just wasn’t feeling that way), so I pulled out all five of my frying pans: which can only mean one thing. Mexican!

Well, my experimental, chicken-stock-softened, supermarket-bought, fried white corn tortillas were a disaster. I will hide them in my lunch box, and eat them hurriedly with my shoulders hunched at work tomorrow.

My Mexican rice, however, was three things. Red, hot, and red-hot!

Today, to console myself for tortilla failure, I lobbed into the Mexico City factory at Mortdale. All their sales dudes were out on delivery (I should have phoned ahead, but I am sooo impetuous), so I high-tailed it back to the inner west where Essential Ingredient has returned from its quixotic relocation to the North Shore, and sells Fireworks corn tortillas for $3.65 for a packet of 12. I am waiting on an email reply from Mexico City to see if they have retail distributers about the place too. If so, I shall post.

I was ravenous by the time I returned home, whereupon fresh tortillas and last night’s Mexican rice, reunited me with my hotness!

Recipe: Mexican rice

Red, hot, rice
This is the too-often overlooked staple of Mexican food. It is delicious and satisfying as a main meal; it can step back and let pulled pork or BBQ chicken pieces take the main credits; it works splendidly cold as a salad; it keeps well in the fridge or freezer. Am I getting through?

This version is spicy, with green and red chillies from my courtyard garden. Cooking for children, I use a half red capsicum, finely chopped, and add a pinch of paprika. My youngest son fully loves red capsicum, and my oldest fully doesn’t.

I find the capsicum is cooked in nicely, hidden in plain sight, and we’re all happy!

Ingredients

  • 1.5 cups long grain rice
  • 3 tablespoons canola oil
  • 1.5 cup all purpose tomato salsa
  • 1.5 cup chicken stock
  • 3.5 cup water
  • 2 cloves garlic, crushed
  • 2 red tabasco chillies, sliced
  • 2 green tabasco chillies, sliced
  • Salt
  • Pepper
  • Tea towel

Method

This is derived from the glorious Diana Kennedy.

Rice: there is a lot of talk about rinsing rice. I don’t rinse rice. I buy good quality rice (rice is cheap), which should be hard and true. Rinsing is a waste of time and water. Gluey rice is not due to the tiny amounts of starch that might be on the outside of the grain membrane, it is due to breaching the membrane (Diana recommends rinsing, but I lovingly disagree).

Heat oil in a generous, heavy-based frying pan on medium heat.
Golden and good to go!
Add the rice and stir through the oil, cooking until rice is lightly golden (5–10 minutes). Drain off oil.

Add to pan tomato salsa, garlic, chillies, salt and pepper.

Once it comes to a high simmer, drop the temperature down and stir. You need to get the mixture down so that it is almost dry again (about 10 minutes).

Add the water. Now, do not stir, but gently even out the rice so that there is even coverage of rice and water. Put the wooden spoon in the sink; say goodbye to it; its job is done. You will stir no more!

What we are doing now is simmering away the liquid and fluffing up the rice. As the liquid cooks off, we gradually drop down the heat. The simmer stays constant; the heat gradually drops. When the rice starts to lift and separate (like a Berlei Bra) and little volcano holes start to appear across the surface (about 10 minutes), remove the pan from the heat and cover with a cotton tea towel.

To keep the towel from flopping into the rice, tuck the corners under the pan, so you get a very Day of the Dead, drum thing happening! The tea towel draws out the moisture, and really helps fluff out the rice (When it comes to tea towels, Diana and I are as one).

And there it is, neither stodgy nor oily; full of flavours both subtle and strong; lunch and re-brand friendly; you can add peas and carrots, mussels and chorizo. Go crazy. Mexican rice!

Friday, November 23, 2012

BBQ rules part 2

The star of the show has to be that beautiful, flaming grill and the rich, smokey flavours (and that cute guy with the tongs and apron).
But to take the pressure off, and to allow for inclement weather, it’s good to have one main dish out of the oven.
Here is a BBQ chicken roast which makes the most of the BBQ occasion, while giving you some breathing space to spread your awesome cuteness around.

Recipe: Barbecue chicken roast with rice

Ingredients

1 chicken cut into 8 pieces (see this post for method)
1 tablespoon olive oil
1 red onion, diced
Chopped herbs: parsley, oregano, thyme, basil
1 bay leaf
2 cups long-grain rice
1.5 cup all purpose tomato salsa
4 cups chicken or vegetable stock

Method

Preheat BBQ grill. Preheat oven to 200 degrees. Place chicken skin down on the grill and cook for 2 minutes each side, or until skin is golden and grill marks show. Pre
Transfer to bowl, cover, and let rest for 10 minutes.

In a casserole dish heated to medium, add olive oil and onion and sauté for 5 minutes. Add juices from the covered chicken pieces. Add chopped herbs. Add tomato salsa, bring the mixture to a gentle boil.

Stir in rice. Stir in stock. Place chicken pieces with the nicest looking side facing up. Season with salt and pepper. Roast, uncovered for 30 minutes, or until rice is soft.


A slightly different version, on a bed of silver beet and rice, tomato salsa on top

Comments

You can either do this several hours before your guests arrive, or pop the chicken on with the haloumi starters and, while your guests are enjoying their entrée nibbles, your chicken is underway and about ready by the time the snags and steaks go on.
This is also a very good stand-alone Sunday evening meal, with lots of left-over school lunch potential.
This week, I made a very pleasant solo laksa with the shredded chicken from my Sunday BBQ roast.


Friday, November 2, 2012

BBQ rules

It’s BBQ season! My very first major purchase in my bachelor mk 2 life - even before a decent bed, which I took delivery of last week - was a good, four-burner, wok-burner on-the-side, barbecue.

Last weekend was a children and parents BBQ. Tomorrow is school buddies only (and not a child in sight).

With any luck my blue tongue lizard will make a reappearance in the garden bed tomorrow, as it was such a hit with the kids last Sunday.

Here are the respective menus.

BBQ menu 1 - adults and kids

Nibbles

  • Eggplant and yogurt dip (from the local Turkish place)
  • Queso blanco cheese
  • Turkish bread

Mains

  • Chicken and rice casserole
  • Marinated pork ribs
  • BBQ veggies

Afters

  • Smoothies (banana and strawberry)

BBQ menu 2 - adults

Nibbles

  • BBQ Haloumi
  • Dips
  • Turkish bread

Mains

  • Lamb skewers - paprika and yogurt marinade
  • Cajun chicken and rice
  • Veggies

Afters

  • Scorched fruit and ice cream

BBQ rules?

What’s that black stuff?

Firstly, the idea that it’s ok for barbecues to be filthy is just plain wrong. A wire brush and a vegetable oil cloth rubdown is essential before and after each use.

For cleaning implements, you can pay extra for BBQ style wire brushes and poly scrubbers - but you pay half for the same (or better) thing if you go to a decent harware shop. It’s basically painting and tiling cleaning tools you want.

Hood up or down?

Down! If your bbq has a hood, it must be down (closed) during most of the cooking, to take advantage of the full, smoky flavours that the bbq is all about.

Preheat!

For any bbq, the temperature needs to be at optimal cooking level before the food goes on. I preheat my gas bbq for 20 minutes before a single slice is sizzled.

Handling meat?

The basic rules are1. Flip the steaks once2. Don’t poke the sausages

For a steak, medium rare, follow the two-minute rule. Place steak on the grill for 2 minutes, turn 90 degrees, leave for two minutes. Flip. Two minutes later, turn 90 degrees. Two minutes later, remove to a covered dish and let rest for at least two minutes. The juices in the dish are now the ultimate BBQ sauce.

For sausages, the important thing to realise is that they aren’t steaks - full on heat will create problems. Get to know you BBQs hot and cooler spots (the all have them, despite the advertising claims) and your steaks go hot and your sausages go medium. Don’t poke. Flip once.

Where your steaks don’t want to go, your sausages do. It’s a beautiful thing.

What about veggies?

Barbecued vegetables (and fruit) is delicious. I use the grill for meat and seafood, and the plate exclusively for non-meat - haloumi cheese, vegetables and fruit. I think it is good manners to vegetarian friends for them to know that their meal is genuinely meat free. It just keep things simple.

Guilty secret? You can’t do eggs on the slotted grill. I use the plate for this. Sorry…

Sunday, September 23, 2012

Simple, easy, tasty, cheesy

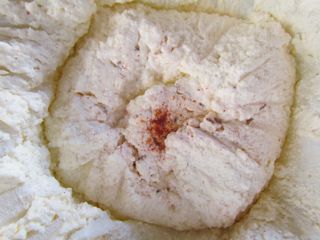
Home made queso blanco cheese.

Keeping to the theme of springtime delights, here is a recipe that brings a creamy and delicious cheese for lunches or snacks, and protein packed left overs (whey) for smoothies that you and your kids will love. Or you can go one step beyond, and use the whey to make ricotta.

Queso blanco is a mild, creamy white cheese great as a base for dips, fantastic with crackers as a snack, and a deeply satisfying addition to many Mexican dishes, including my flat food pt 2!

In its simplest form, it has a mild and wholesome flavour like bocconcini - but spreadable. It doesn’t melt, however - until it reaches your mouth!

What do you need to make this treasure? Milk, salt and vinegar. And a piece of cheese cloth (muslin). However, if you like a little extra, this cheese comes to new life if you add herbs or spices such as cumin, chives, pepper … hmm. Nice.

You can make this with regular supermarket milk, but it really benefits from good quality full cream milk. Riverina brand is good I think. But any full cream milk will work.

BTW, I like the pic below, because the cheese in its wrapper reminds me of the face-hugger pods in Alien.

Recipe: Queso blanco

Yields

  • 400–600g cheese
  • 2 litres whey

Ingredients

  • 4 litres full cream milk
  • 1/3 cup white vinegar
  • 2 tablespoons salt
  • 2 teaspoons crushed cumin seeds
  • 1 pinch smokey paprika

Method

Heat milk in a pot (start heat low, then increase to medium if you want to reduce your pot-cleaning at the end) until the milk is just about to boil. You can tell it’s close because tiny bubbles start to rise, there is a shimmering on the surface - and it feels really hot to your pinky!

Then pour in your vinegar and gently stir. Here the magic happens, and the curds start to separate from the whey. The curds (from which we’re making our cheese) are lumpy and stringy, and gently stirring will help the separation process. Remember the separation process? Well, this one ends in cheese! And whey.

Stir gently for a couple of minutes. Turn the heat off, then stir gently for another five.

Line a colander with a piece of muslin about 40 cm square, and place over a large pot or dish to retain the whey.

Gently pour the curds and whey through the strainer Occasionally you’ll need to gather the corners of the muslin and squeeze out the liquid a little.

When all the whey has passed through and all that is left only a little puddle that can be contained inside the muslin line colander, it is time to add the remaining ingredients.

Sprinkle the salt and the cumin, and a little pinch of paprika onto the cheese. Tie the quarters of the muslin using some cooking string and hang over to sink for four hours, or up to 12.

Return the remaining whey to one of the milk bottles and place in the fridge this you can use later for really yummy, protein-packed smoothies.

You can also use the whey to make ricotta.

Now, you will find many recipes on the internet for what is basically my queso blanco, claiming this is ricotta. Wrong! Ricotta (Italian for re-cooked) is not strictly a cheese, but a biproduct of cheese making, by using the whey. They ricotta makes use of a different set of proteins than those that form the curds of the queso blanco.

I have never made ricotta (I generally can’t wait to get the bar mix out for those smoothies!) but here are two recipes for making ricotta from whey.

Monday, September 17, 2012

Flat food pt 2

Spring is here. Time to start thinking about lighter, sharper, busier flavours. Thank you comfort foods, your job is done. Time for the party plate!

All over Sydney Mexican restaurants are opening like cactus flowers. As a home cook cuisine, Mex is really good fun, and a good combo of plate food and portable food. Diana Kennedy’s “The cuisines of Mexico” is the very best place to start.

In the meantime - here’s my main meal flat food.

Corn enchildas, cumin lime pork, refried beans and white cheese.

I like soft corn tortillas, but they are much harder to find in supermarkets and delis than the wheat variety. Try Senor Nila on the northern beaches, Mexico City in the south, or Fireworks in the west. Otherwise, Woolies stocks the “A taste of Mexico” brand which has white corn tortillas, which I used for this recipe.

The mild white cheese in Tex Mex is Monterey Jack. There are some very funny posts on blogs about how difficult it is to import American cheese into Europe, mostly ending in - what would we need this awful cheese for anyway?

‘Monterey Jack’, or the more Mexi ‘Questo Blanco’, are pretty bland cheeses that can be substituted with bocconcini, or other mild white cheese. OR you could make your own! Easy and so tasty! See our next exciting recipode for home made Queso blanco. I am eating it spread on crackers right now, and it’s yum!

Recipe: Lime pork enchiladas

Ingredients

Yields 8 enchiladas

  • .5 kilo pork mince
  • 1 can red kidney beans
  • 8 soft corn tortillas
  • 2 tomatoes
  • 1 brown onion
  • 1 red onion
  • 4 tablespoons canola or other vegetable oil
  • .5 cup chicken or vegetable stock
  • fresh coriander
  • ground cumin
  • pepper
  • juice 1 lime
  • 1 cup grated or crumbled mild white cheese
  • .5 cup grated cheddar cheese

Method

Preheat oven at 160 degrees Celsius.

Finely chop tomato, coriander and red onion. Set aside

Pan fry the pork mince in the vegetable oil with pepper, and coarsely ground cumin. Add juice of lime, stir until evaporated and pork is browned. Set aside.

In the same pan, using the oil left over from the pork, sauté diced brown onion.

Add the red beans, including the broth, stir and mash. After a while, they mixture will start to gather into a kind of pancake. Once you can roll it off the pan, it’s ready.

Set aside.

In the same pan, bring stock to a simmer.

Rest each corn tortilla in the stock until they soften (about 30 seconds).

Place on each tortilla a tablespoon of the pork, beans, tomato, and white cheese. Roll each tortilla and place on an oven tray. Sprinkle with yellow cheese. Place in oven until the yellow cheese starts to brown and the inside juices start to bubble from within - about 30 mins.

Monday, September 10, 2012

Flat food p1

Last Sunday was fathers day, and my boys suggested, as a fathers day treat, that I make them pancakes.

Actually, the request was more specific. The word was crepes.

Flat breads of various kinds are incredibly useful bachelor foods for breakfasts, snacks, work and school bags.

And for dinner? How about corn enchiladas with cummin-lime pork? More on that in Flat things pt 2.

Crepe or pancake. Basically the difference is a pancake includes a raising agent and a crepe doesn’t.

Crepes are more likely to be eaten folded or rolled, while pancakes are more likely to be eaten with syrup or salsa.

Smaller pancakes (flapjacks) can be eaten in a stack.

If you add extra caster sugar (and some vanilla essence) as well as a raising agent and make smaller cakes, you get pikelettes, which seem to be an Australian / New Zealand invention.

Wikipedia has a really good discription of pancake styles around the world at http://en.wikipedia.org/wiki/Pancake

Crepe recipe

Ingredients

  • 1 cup plain flour
  • 1.25 cups milk
  • .5 teaspoon caster sugar
  • 2 eggs
  • 1 tablespoon butter

Yields 6–8 crepes

Method

The most important thing is not about making the crepes, but keeping them warm. Put the oven onto 60 degrees now, and pop in a dinner plate.

Mix all ingredients except the butter in a mixing bowl using a whisk. The mixture needs to be smooth. When you lift your whisk out of the mixture, it needs to run, rather than fall in blobs (not too thick), but leave ripples where it falls back in the bowl that stay for a moment or two (not too thin).

Heat half the butter in a frying pan. The heat needs to be high enough for the butter to melt and start to bubble, but not so high for the butter to burn.

When the butter is melted and coving the pan evenly, add the batter, just enough to almost fill the pan. I like to leave about a cm of space on the outside to the edge of the pan because I think the slightly smaller size looks better on the plate, and that bit of extra space makes turning the crepe a little easier.

When the edges of the crepe start to turn up, and small air bubbles start to pop in the mixture, it is time to turn them. Add extra butter as required.

Remove them one by one to the warming plate.

Serving

My boys and I like sprinkling with raw sugar and lemon juice and rolling them up. Yum!

A side benefit to crepes is that it is one of the few ways my kids will eat eggs without the slightest hassle.

Thursday, August 23, 2012

What about the little dudes?

An adult interlude ...

Results for previous entry Adult food were quite satisfactory. Couscous is a lovely stuffing medium, and the combination of lime and dried fruit works very well. A jar of whole spice garam masala should be placed along side of my Good old standbys of a previous post. The rice was yum and well received. Relief!

Adult conversation turned (inevitably) to feeding kids.

My most intensive cooking time for my boys (until bachelorism, where cooking is making a comeback) was from late nappies to kindy - them, not me.

Rule 1: Size matters
Rule 2: Time matters
Rule 3: What matters, matters

The most important thing you can teach a child about food, is how to eat something they don’t particularly like.

Size matters

This is so easy to forget. We see it every day. But children are ... small.

Some children of course will just eat what’s put in front of them. They feel hunger strongly and will only complain if what you dish up is truly disgusting. Most, though, find mealtime a challenge for various reasons. Back to size.

Place your hand, fingers stretched out, on the kitchen bench. That is about a meal. A little less than a meal maybe, but in the general neighbourhood. Now think of how much smaller a four-year-old's hand is compared to yours.

For a little dude about 1 metre high, an adult size serve of food looks like a sack of potatoes. Even if they know they can eat it, it just looks … big!

Time matters

I remember a friend remarking on her beloved grandmother’s perception of time passing. She was so used to it, time slipping by: “it’s like, every 15 minutes, you’re having breakfast again”.

It takes time to learn about time. For children, a week is a month, a day is a week. Five minutes is an hour.

Put something in front of them that they know will take half an hour to eat … it’s not so much the food, it’s getting their heads around anything that can take so long.

For both rule 1 and 2, my advice is think small. By all means, cook what you think they’ll eat. But don’t serve what you think they’ll eat. Serve them half first, and let them eat it, and achieve it. Let them take a break, leave their seats, see if the rain has stopped or what the sunset looks like, then come back to the table and have a second helping.

What matters, matters

The most important thing you can teach a child about food, is how to eat something they don’t particularly like.

This is something that “cooking for children” books don’t tell you, because all of their recipes are so great that any child will love it (unless you’ve been a bad parent, which you probably have been…).

Managing likes and dislikes is exactly the same as managing emotions. A huge amount (possibly the full helping) of growing up is about finding a way to distinguish between minor and major catastrophies - can you be the judge?

It is important to recognise that kids have a right to likes and dislikes. It’s also good to teach them to make decisions and judgements. Their likes and dislikes really matter to them, and they should really matter to you. It’s also important for children to learn that not every dislike is a game-breaker.

If there is a plate of food that contains stuff your child likes and stuff your child doesn’t, you can say: Which is the stuff you will eat all of, which is the stuff you will eat some of, which is the stuff you will eat a tiny bit of…? If they make these decisions easily, good. If they are really stuck, you can offer them something on the plate that they don’t have to eat at all, provided they eat more of something else. You just need to be giving them healthy options.

Conclusion

The most important of these is - What matters, matters. Learn from your child, and your child will learn from you.