Tuesday, November 19, 2013

A surprise pie!

I had some bacon and eggs in the fridge, but felt like doing something other than frying, and the result was very pleasing and provided a lovely bachelor meal and tasty work lunches to boot. I can hardly wait to run it by the boys!

I’m new to the pie game, but I’m getting better at it. And so far - the boy test has been ok.

Generally you use a short crust pastry for the bottom and puff for the top, but this time I used puff all around, and really enjoyed the result.

Recipe - Bacon and egg pie

Ingredients

  • 2 sheets puff pastry
  • 4 rashers bacon, rind removed
  • 5 eggs
  • 1 onion
  • 1 red capsicum
  • .5 cup grated mild cheese
  • .25 cup crumbled stilton (or other blue or bighty cheese)
  • 1 handful green beans
  • 2 tablespoons chopped shallots
  • 2 birds eye chilies, chopped
  • ground pepper and cumin to taste
  • Butter for greasing the pie tray

Method

Preheat oven to 180º. Grease a 25cm (or there abouts) pie dish with butter.

Take 2 sheets of puff pastry and allow to thaw (no, I’m not quite up to making my own pastry yet)

Chop bacon, onion, capsicum and beans. Place in a cold frying pan on medium to low heat on the cooktop. This allows the bacon fat to render out and the flavour to distribute nicely. Sauté for 10 minutes. (If you’re feeling lazy, you can just pile everything into the pie and cook, but the result isn’t as good)

Place a sheet of pastry into the pie tray and trim the edges with a sharp knife. Stretch the pastry out a little so that there is some extra over the sides (the puff pastry will shrink a little in the oven).

Place the pie tray and pastry base in the oven for 10 minutes. By this time, the pastry will have ballooned up, but that’s ok. Poke of few holes in and pat it back down flat, then add mixture from frying pan.

Sprinkle cheeses over the top.

Take one egg and whisk in a small bowl.

Crack the other 4 eggs over the top of the pie mixture. Sprinkle chilies and shallots. Season with pepper and cumin.

Top with the second sheet of puff pastry.

Trim with a sharp knife and brush the pastry with the egg mixture to that it glistens. This will help the pastry go golden and crispy. With a fork, poke holes in the pie lid to allow steam to come out.

Return to the pie to the oven and cook for 40 minutes.

Remove when golden!

Sunday, November 17, 2013

Lamb two ways

A rainy no-child Sunday begins with a hangover and a bus ride to Marrickville Market.

I love cooking and shopping with my boys, but I struggle to find the right balance of doing jobs and needfuls, and just hanging out, playing games and reading, and going on adventures. I suppose that, over any 2-month period, you do all of those things, you can’t be too bad a dad…

This week, I’m cooking ahead with a leg of lamb from Marrickville Market’s Young Lamb Man. Young is here. Marrickville Market is here.

As you know, I like to butterfly a leg of lamb to retain the bones for stock, and marinate and barbecue for yiros.

Today, though, I tried to make the most of the two major cuts in a lamb leg - the shank, and everything else.

The shank I set aside for a bachelor soup or the slow cooker, while the rest I butterflied, rubbed with garden herbs, and tied into a roasting roll.

The roasting roll is now marinating in the fridge, with the shank tucked into the freezer.

The roast is a 3-boy dinner, with enough for school lunch wrap the following day. Super!

Recipe - easy carving herbed lamb roast

Ingredients

  • Butterflied leg of lamb
  • 2 sprigs rosemary
  • 2 sprigs sage
  • 1 clove garlic
  • 2 tablespoon olive oil
  • cooking twine for tying

Method

With a mortar and pestle (or blender) create a herb paste with the rosemary, sage, garlic and olive oil.

Lay out the lamb with the fat side down, and rub the paste into the lamb.

Roll the lamb and tie with cooking twine. Today, I used three butchers knots across, and one down the length, which works fine - but there are prettier, more elaborate ways to do it.

Place it, covered, in the fridge for a of hours (or overnight) in this case.

Remove from fridge about an hour before you plan to cook it.

Preheat oven to 200º.

Roast uncovered for 15 minutes. Drop temperature to 160º. Remove lamb from oven to baste with pan juices. Return to the oven for another 30 mins, basting again after 15 mins.

This should achieve a medium-rare roast, with lovely pinkish slices with a crispy crust.

If you prefer medium or well done, just add one or two extra 15 min cooking periods - but don’t forget to baste for each!

Remove from oven and let rest for 5 to 10 minutes before carving.

Butterflying lamb leg and removing the shank

Tying a butchers knot

Sunday, October 13, 2013

Marrickville chicken feast!

At Marrickville Markets the other day, I was assured by the Wootton beef guy, that the chickens he sold from his mate’s farm would be the best I’ve ever tasted. A big call. But I can confirm it was pretty damn good. This is how I cooked it.

Recipe: Chicken pieces, risoni pasta, and green beans

Ingredients

  • 1 chicken cut into eight pieces
  • 3 cups chicken stock
  • 2 cups risoni
  • 3 cloves garlic
  • .5 kg green beans
  • 1 cup all purpose tomato salsa
  • 3–4 red, tabasco chilis, chopped
  • Chopped parsley
  • 4 tablespoons olive oil
  • Black pepper

Method

You’ll need a heavy-based oven-proof pan with a good lid. Preheat oven to 200º.


In this dish, place chicken pieces skin-side up, along with peeled garlic cloves, halved. Drizzle with olive oil. Season with pepper.
Cook uncovered in the oven for 15 minutes until the skin begins to brown and look crispy.

Remove from oven, drop temperature to 150º. Removed chicken pieces from pan, add chicken stock, then risoni and beans.

Return the chicken pieces to the pan, then sprinkle the tomato salsa and chopped chilli over the top.

Cover, and return to oven for 30 minutes. We’re aiming for the risoni to be plump and soft, but not mushy.

Finally garnish with chopped parsley.

Monday, September 30, 2013

Open fire barbecue - talk to the hand!

Building a fire under a grill brings a whole new level of enjoyment to one of my favourite things - the barbecue. The kids especially enjoy busting sticks and scrunching newspaper.

The key of course is to wait for the flames to die down until they are gently waving over the coals, and spread the coals out evenly before adding the food.

Most barbecues, but especially open fire bbqs, will have hotter and cooler regions.

The easiest way to locate these is by holding the palm of your hand out, starting high and working low. If your hand gets uncomfortable within about 5 seconds about 6–8 centimetres from the hotplate, that’s good for steaks and veggies. If it takes longer, that’s good for sausages. And if it feels hot but not hurty, that’s where you send your cooked stuff to keep warm.

On our holiday on the NSW central coast, I had the kids kindling up which I chopped the veggies and cleaned the squid (fresh from the Wallace Lake co-op - super!) My eldest leaned over my shoulder and asked how I was going to cook the carrot - he saw a saucepan nearby and disapproved.

Preparing the vegetables

When I said I planned to steam them, he said “No Dad, we love them when they’re barbecued!” I tell myself I’m a selective pushover!

To my surprise, my Mum who was with us had never seen carrot cooked this way - and if you haven’t tried it, it works a treat! Unlike potato, you don’t have to par-boil it, just whack it on the plate until it begins to blacken in places, and turn it once like a steak.

The trick with barbecuing all veggies, is to oil the veggies, not the grill. Slice it all up, pop it in a plastic bag, pour in some oil, give it a shake, and you are ready to go!

Cleaning squid

Don’t be intimidated - it’s not so difficult. Hold the hood in one hand, reach in above where the tentacles are, and pull the two sections apart. The guts and ink sack will come out pretty easily. If the shorter tentacles are longer than about 4 centimetres, I keep them. The very long pair I discard, as they are gristly. You can either cut the tentacles away from beneath the beak or dig the beak out and keep the tentacles connect - this is probably best if you’re barbecuing.

For the hood, once you pull the wings off (they are also gristle and are discarded) the thin layer of skin comes off pretty easily. Then you simply slice across for calamari rings.

For barbecuing, the pieces need to be oiled in the same way as the veggies, and cooked hot until they just begin to blacken.

My family and I were very happy with our open fire mixed grill!

Saturday, September 7, 2013

Pretty pollie chicken

It’s election day in Australia, and in honour of the rubber chicken sandwiches all politicians endure at fundraising barbecues, here is a super recipe for a tender, juicy, tasty bird. All you pollies out there, this is how your fundraisers can step up!

I had a bunch of friends over for Sunday barbecue a couple of weeks back, with queso blanco dip and paprika yogurt chicken the main features, along with barbecue fried haloumi, grilled octopus, and salads (salads contributed by my excellent guests!)

It’s always very gratifying when someone asks a “how did you?” question. In this instance: “How did you get the chicken so juicy?”

Well, here it is.

Recipe: Barbecue paprika yogurt chicken

Ingredients

1 chicken

Marinade

  • 2 cloves garlic
  • Juice .5 lemon
  • 1 tablespoon olive oil
  • 1 teaspoon tahini
  • 2 teaspoons smokey paprika
  • 1 teaspoon cayenne pepper
  • 2 tablespoons yogurt

Method

This can be done either with a butterflied chicken or with chicken pieces. For barbecues, I prefer cutting the chicken into pieces, giving me one less job at serving time.

For barbecuing and casserole, I tend to leave the breast bones on rather than fillet the breast.

Mix all the marinade ingredients in a mixing bowl. Then dip each chicken piece in one at a time, making sure each piece is thoroughly covered, then transfer chicken pieces to an oven dish, and cover.

Place in the fridge for at least 3 hours, but overnight is best.

About an hour before cooking, remove the chicken from the fridge to that it returns to room temperature.

Heat barbecue grill on high and preheat. The way you tell if it’s ready is to place your hand about 10 centimetres above the grill and, if it ouches after about 4 seconds, it’s ready. This is also a good way of mapping the hotter and cooler sections of your grill.

Now, here’s the secret! Preheat oven to 150°.

Before placing the chicken on the barbie, wipe of excess marinade with a paper towel. I sometimes forget, or am too lazy, to do this, but I always regret it, as the extra fat in the yogurt can make the chicken prone to flare-ups.

Place the chicken pieces on the grill, skin side down, with the wings on the cooler spots of the grill. Once on the grill for a few seconds, give the pieces a gentle shift, to keep them from sticking. Barbecue covered for about 5 minutes each side, turning once.

While the chicken is cooking, give your oven dish a thorough clean.

Once the chicken is done, place the pieces into the oven dish, cover, and pop it into the oven to finish off - about 15 minutes.

And there you have it, tender, juicy, tasty chicken (and rich juices in the dish) ready for the plates of happy guests!

Saturday, June 29, 2013

May the sauce be with you

Kids love tomato sauce, and I’ve got no real problem with having a bottle from the supermarket in the fridge. The trouble is that supermarket sauces do contain a ridiculous amount of sugar, often including high-fructose corn syrup, which has a very intense sweetness produced through an equally intense manufacturing process. Isn’t sugar sweet enough for crying out loud?

So, with my kids away, it’s time to experiment. The aim is to have ketchup perfection by the time Spring, and another barbecue season, rolls around.

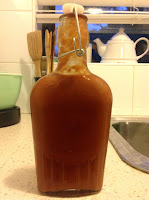
This is the recipe I tried for my first batch. It produced about 4–5 cups of good, tasty ketchup. As you can see, the colour is reddish brown, which is fine for me, but my boys will be expecting that nuclear red of commercial sauces. My hot, sweet chilli sauce from a previous post - Missing, making, and bringing the bling - is a very bright red, so next time I think I’ll include a roasted and peeled red capsicum. I will also try adding a granny smith apple for a smoother consistency.

Once I get the regular ketchup sorted, then I’ll turn to a slightly spicy barbecue sauce for my 11-year-old who likes a little more punch!

For this recipe, I used my slow cooker. Once I’d completed the saucepan and frying pan mixes, I popped it into the ceramic slow cooker insert, and refrigerated, covered. Just before going to bed, I pulled it out and placed it into the cooker, set it on low, and away we go!

Recipe - Ketchup

For the small saucepan

  • .5 cup cider vinegar
  • .5 cup vegetable stock
  • 2 tablespoons brown sugar
  • 2 tablespoons Worcestershire sauce (I like Lea & Perrins)
  • 1 cinnamon stick
  • .25 teaspoon allspice
  • 1 teaspoon Dijon mustard
  • 1 clove

For the frying pan

  • 2 cans tomatoes
  • 2 tablespoons olive oil
  • 2 tablespoons tomato paste
  • 1 onion
  • 2 clove garlic

Method

In a small saucepan, heat the saucepan mixture, bringing to a boil, and stirring to dissolve the sugar and evenly distribute spice and mustard. Once this is achieved, turn off the heat.

Heat pan on medium, add oil, coarsely chopped onion and chopped garlic. Sauté for 5 minutes. Add tomatoes and tomato paste, stirring. Raise heat to bring to boil, simmer for 5 minutes. Turn off heat.
Tip the frying pan mixture into your slow cooker. Pour the saucepan mixture through a strainer into the slow cooker also.

Cook on low for 8–9 hours.

(You can just as well simmer in a larger saucepan for about 3 hours)

Let the mixture cool a little, the put through a blender or smooth-up with a bar-mix.

Place into sterilised containers and refrigerate. What you don't bottle, you can freeze for several months.

There! Who says bachelors can't be saucy?

Monday, June 24, 2013

Bachelor stockings!

There is something about the very small effort over a very long time when making stock that just works!

With my under–9 football team’s game rained out (go the mighty Wanderers!) - and a rainy weekend ahead of me - I took the opportunity to go to my local butcher and spend a couple of bucks on bones. I already have three chickens worth of backs and wingtips in the freezer. So: Saturday is beef stock; Sunday is chicken stock.

For beef stock, the best bones to choose are marrow and chuck bones - the leg and the neck.

My meal plans for the beef stock I’m making today are: slow-cooked rendang danging (Indonesian beef curry), slow-cooked osso bucco with citrus and, for when my children come back from a holiday with their mother, spaghetti bolognese. I’ll have enough for another two meals at least, but don’t want to give myself a headache from thinking too far ahead!

For this recipe, which yields 2 litres of stock, you’ll need an 7 to 8 litre stockpot.

Recipe - brown beef stock

Ingredients

  • 2 kilogram beef bones
  • .25 cup olive oil
  • 2 carrots
  • 2 onions
  • 2 stick celery
  • 2 portabella mushrooms
  • 2 medium tomatoes
  • 2 tablespoons tomato paste
  • 4 litres water
  • 5 black peppercorns (lightly crushed)
  • 2 bay leafs
  • 2 sprigs oregano

Method

  1. Have your butcher cut the marrow and chuck bones into pieces. At home, remove any excess fat
  2. Preheat oven 200°C (fan-forced) and place bones in a large baking tray, drizzle with olive oil. Roast for 15 minutes. Turn, then roast another 15 minutes
  3. While the bones are browning, chop vegetables into chunky pieces
  4. Heat for litres of water in a stock pot
  5. When bones are done, remove them to the stock pot and add some water to the roasting pan to deglaze. Add bay leafs, oregano sprigs and pepper corns
  6. Place chopped vegetables into the pan and return to oven. Cook for a further 15 minutes
  7. Place vegetables into the stock pot and bring to boil for about 10 minutes. Reduce to simmer a slow boil - you need more of a boil than a simmer to make sure you extract all the marrow and other goodness from the bones
  8. Over the next few hours, come back every 30 minutes or so to enjoy the aroma, and to skim the froth can scum that rises to the top. A slow boil for 4 hours is best, or a little higher for 2 is also ok.
  9. When you’re ready, remove the big bits from the stock pot with tongs
  10. Skim and strain through a muslin lined sieve into a clean container, before dividing, stir to get an even consistency at the end
  11. Cool quickly by dividing stock into small containers - about 2 cups is good, and refrigerate for several hours or overnight.
  12. Remove layer of fat, under which you will have fantastic, jelly consistency, super-tasty beef stock!Reseal
  13. Label and date stock and freeze for up to 3 months

Tuesday, May 28, 2013

Greek-to-Thai rebrand

On the weekend I popped over the river to Campsie and had my Chinese butcher butterfly a leg of lamb for yiros. But rather than go straight to a mini Greek feast (I didn’t have my kids last weekend), I turned my mind to what else I might do with marinated, medium rare, barbecued strips of lamb.

Re-enter the Bachelor Food principle of rebranding or, in this case, pre-branding!

In the recipe below, I pan fry a fillet of lamb. Last Sunday, I sliced from my freshly barbecued lamb prepared, the remainder of which was set aside for school and work lunches, and yiros dinners - including sliced onions, lemon juice and sumac - but that is another story.

For this recipe, strong, well-defined tastes are what you want. Use fresh herbs, not dried. For instance, I would normally use lemon grass, but had run out, so, instead of using dried lemon grass, I substituted chopped leaves from my lime tree.

Recipe: Thai lamb larb (warm lamb salad)

Serves 2 as a main, 4 as an entree

Ingredients

  • 300g lamb backstrap fillet
  • 2 tablespoons peanut oil
  • .5 cup chopped roasted, unsalted peanuts
  • 2 cups shredded baby cos lettuce leaves
  • 1 lebanese cucumber roughly chopped
  • 1 thinly sliced red onion
  • 2 thinly sliced radish
  • 1 carrot julienne
  • 2 tablespoons chopped coriander leaves
  • 375g rice noodles

Sauce

  • .25 cups ground, dry fried rice
  • 1 tablespoon peanut oil
  • 3 tablespoon fish sauce
  • Juice 1 lemon
  • 1 tablespoon palm sugar
  • Chopped fresh herbs, about a teaspoon each: Kaffir lime leaves, mint (or lemon grass, shallots, coriander - whatever is fresh!)
  • 2 birds eye chilies, chopped

Method

Heat rice in a dry frying pan, and cook until golden brown. Remove from pan and crush with a mortar and pestle.

Combine lettuce, onion, radish and carrot.

Place peanut oil, fish sauce and lemon juice in a small saucepan and heat, but don’t boil. Add sugar, crushed rice and chopped herbs and chili.

Heat peanut oil in a frying pan on medium-high heat. Fry lamb fillet two minutes on each side, then let rest at room temperature for 10 minutes. Slice into thin strips. The strips should be browned and slightly crispy on the outside, and lovely and pink, but not bloody, in the middle.

Place the lamb strips into the sauce.

Boil water in a saucepan and add noodles. Rice noodles cook very quickly, about two minutes should do it. Strain.

Arrange on plates or bowls: first noodles, then salad vegetables, then lamb strips, then sauce, and last garnish with crushed peanuts and chopped coriander leaves.

Thursday, May 16, 2013

Apple crumble beats the tummy rumble!


I’m not a big dessert person but, with my oldest son going into pre-teen appetite overdrive, it is time to call for reinforcements. Enter: Grandma’s apple crumble!

When my youngest was 1 1/2 and my oldest was 3 1/2, I started two wonderful years as primary carer.

One of the first things I did was sit down with my Mum and go through all the meals that I remembered and loved from my early childhood, and collect them. It’s amazing how many meals from the sixties include a can of soup as a key ingredient! Not this one though.

Apple crumble is healthy, quick to cook, and cheap: a great way to fill up a growing child, and a super breakfast too for the following morning.

Recipe: my Mum’s apple crumble

Ingredients

Filling

  • 6 to 8 Granny Smith apples, depending on size
  • .25 cup water
  • 1 teaspoon sugar
  • 2 lemon wedges
  • 2 cloves

Crumble

  • .5 cup wholemeal flour
  • .5 cup rolled oats
  • .25 cup brown sugar
  • 80 grams butter
  • 1 teaspoon ground cinnamon

Method

Preheat oven to 180˚

Filling

You can either slice the apples and cover with crumble and do the whole lot in the oven, or steam the apples separately, then cover with the crumble and just finish off in the oven to brown the topping. I prefer to steam the apples separately.

So …

Peel, core, and slice the apples. Place in saucepan with water, sugar, lemon wedges and cloves. Cover and bring to boil, then reduce heat to low and cook for 2–4 minutes.
Pour off excess water. Remove cloves and lemon. Cover apple filling and set aside.

Crumble

Mix dry ingredients in a bowl. For the butter, I generally place it in a small dish on top of the lid of the apple saucepan so that it melts, but room-temperature butter is easily worked through the dry ingredients.

Once you have thoroughly worked through the butter and created a consistent mixture, you are ready for the next step.

Combining

Place the apple in a shallow baking dish, cover evenly with the crumble mixture, and place in oven for 10–20 minutes, or until the crumble is golden brown.

Serve with ice cream or custard.

Tuesday, May 7, 2013

Three pots


Pot number one!

In praise of the three pot rule

In some ways this is even more important in a big kitchen where all that bench space can tempt you to reach for one pot after another the moment you feel the need. Yet, for the bachelor kitchen, the three pot rule is equally relevant.

In fact, the only rule more relevant is this one: “Everything in moderation (including moderation)”.

Now, where were we?

Figuring out how the family meal (even on the nights when it is a family of one) can be accomplished with three pots or less is a way of planning the meal project, getting it done with good care and little waste.

My favourite pot is a Le Creuset shallow casserole dish. One of the many things I like about it (apart from it being a gift from good friends) is that the lid handle allows the lid to sit stable and flat, making it the perfect place to rest browned meat or sautéed vegetables.

Like this.

Recipe: Braised steak with onions, mushrooms and red wine

Ingredients

  • 1 large onion
  • 2 cloves garlic
  • 2 tablespoons tomato paste
  • 2 tablespoons Lea and Perrins (or other Worcestershire sauce)
  • 4 tabasco or birds eye chilies
  • 1 double handful button mushrooms
  • 1 double handful garden herbs (parsley, oregano, basil)
  • 2 round steaks
  • 1 cup beef stock
  • 1 cup red wine
  • 1 cup plain flour
  • 1 tablespoon each: dried oregano, ground black pepper
  • 2 tablespoons olive oil
  • Salt and pepper to taste

Method

  • Place flour, dried oregano and pepper in a clean bag
  • Halve the steaks and shake in the flour bag one at a time and set aside (like on the lid of your handy casserole dish!)
  • Peel and slice onions into rings
  • Clean mushrooms (I like to leave them whole for this dish, just trimming the stalks)
  • Peel and slice garlic cloves, chop chilies
  • Heat oil in a heavy based pan
  • Brown steaks on each side, then set aside
  • Add onion and drop heat to low. Sauté for a few minutes. Add garlic and sauté a few more minutes
  • Turn up heat, then add wine and boil off the alcohol and deglaze the pan
  • Add mushrooms and chilies and, once the liquid boils again, add stock, Worcestershire sauce and tomato paste, and again bring to boil. Return the steaks to the pan. Then, when the liquid boils one last time, drop to a very low simmer
  • Cover and simmer for one to two hours
  • 30 minutes before serving, toss in round beans and cover again
  • 15 minutes before serving, toss in garden herbs and cover again
Serve with steamed rice (pot number two)

A two-pot screamer!

Sunday, March 31, 2013

Is Yiros. Is Good!

I love a hamburger, I love a doner kebab. But nothing beats a yiros. And the fact that it’s so easy to make at home says it all. Simple ingredients, simply combined.

Pita bread is softer than lebanese bread, and much softer than lavash. This makes it perfect for warming on the grill without becoming brittle.

When ordering the lamb, I ask my butcher to debone and butterfly the leg. If done well, you get a single piece of lamb, one side with a layer of fat, one side lean, and of fairly even thickness. If that’s not what you get, find another butcher (or ask more explicitly next time, as I’ve often found that butchers and other artisans like being asked to show off their skills, rather than all day serving up standard cuts). Ask for the bones too, and place in your stock bag in your freezer.

But it's not so difficult, and kind of fun, to do it yourself, so I've included a youtube how-to video at the bottom of this post.

For a single meal for me and my boys (say 2 or 3 yiros each) this leaves enough tasty lamb for a couple lunches and another meal at least.

Recipe: Yiros

Ingredients

Lamb

  • 1 leg of lamb, boned and butterflied
  • 2 tablespoons dried oregano
  • 2 cloves garlic, crushed
  • 2 tablespoons olive oil
  • 2 lemons, juiced

Yogurt sauce

  • 1 cup Greek style yogurt
  • 2 cloves garlic
  • 1 lemon juiced
  • 1 teaspoon ground cumin

Other accompaniments

  • 3 tomatoes
  • .5 iceberg lettuce
  • 2 onions

Method

Lamb

Combine oil, lemon juice, crushed garlic and oregano.

Place lamb in a baking dish or similar, and rub marinade over the surface of the lamb, making sure the surface is well covered. Cover and refrigerate overnight or for 2 hours at least.

Yogurt sauce

The yogurt sauce can be done and kept overnight too, as the flavours develop over time.

Greek style yogurt is creamy and smooth. If using regular yogurt, it’s best to hang it overnight in cheese cloth. Even Greek yogurt can be strained in this way for an hour our two, which will give it more room to accommodate the lemon juice and retain its creamy consistency.

Crush garlic, and stir through yogurt with cumin.

Accompaniments

Finely slice tomatoes and lettuce Finely slice onions and soak in lemon juice

Pita bread

Heat your bbq plate (or frying pan) to medium heat. Brush pita bread with olive oil. Place oiled side onto cooking surface. When the underside is browned and ready, quickly bush the upside and flip. Do this one, two or three at a time depending on how big the cooking surface is, and keep warm.

Lamb continued

Bring BBQ grill to high heat and place lamb fat side down for five minutes. Turn and cook for another five. Drop heat to low for another five. Remove from heat and let rest, covered, for ten.

Assembly

Now it’s assembly time!

I like having squares of grease-proof paper (get it?) or white paper bags on hand, because the kids love it, and it feels normal.

Brush the pita bread with the garlic and yogurt sauce. Kids may prefer supermarket tomato or or bbq sauce, but if you add a little of the white stuff, they might not notice - and the journey has begun!

Slice the lamb into thin slices and add, along with sliced tomatoes, shredded lettuce, and onions.

Roll ’em. Eat ’em. Is yiros. Is yum!

How to butterfly a leg of lamb

Friday, March 29, 2013

Israeli eggs

Shakshuka is the Israeli variant of a common Mid-Eastern/North African dish, popular as a breakfast, but versatile enough for any meal.

It is basically - eggs poached over a spicy tomato salsa. Simple and tasty, but with something extra that lifts it above the ordinary.

If you’re looking for a main meal version try, as I did, adding a bed of couscous, as well as crumbling in feta and adding sliced mushrooms. Sliced chorizo is nice to add also, but this plays merry hell with its Kosherness! Finely chopped red and yellow capsicum can also be added to the onion and garlic at the beginning. All good!

Recipe - Shakshuka

Ingredients

  • 1 onion
  • 2 cloves garlic
  • 2 cups tomato salsa
  • 2 tomatoes
  • 4 eggs
  • 1 teaspoon ground cumin
  • 1 teaspoon paprika
  • 1 teaspoon cayenne pepper
  • 2 cups couscous
  • 2 cups water
  • 2 tablespoons olive oil
  • Sprigs parsley or coriander to garnish

Method

  • Chop garlic and onion and, in a heavy based frying pan, sauté in olive oil over medium heat
  • Chop tomatoes
  • Once the onion turns transparent and begins to brown, stir in cumin, cayenne and paprika
  • Add chopped tomatoes, simmer for 5 minutes. Add tomato salsa and simmer for another 10. Add salt and pepper to taste
  • Place couscous in a bowl. Boil the water, and pour over couscous. Cover and let stand for 5 minutes
  • Break eggs, evenly spaced, onto the simmering tomato mixture in the pan. Once the eggs are poached the way you like it (you might want to pot them under the griller to finish them off), they are ready to serve
  • Serve on a bed of couscous, garnish with parsley or coriander

Saturday, February 23, 2013

Simon and Garfunkel Rillon

Locked in on a rainy day, I’m laying the foundation for a week’s work of bachelor food. Chicken stock, beef fajitas, and pork belly rillon.
This is a French dish which, done in the traditional way, is basically fat deep fried in fat.

I don’t do it this way. You want something to warm the cockles of your heart, not harden them.
This recipe is more based on the River Cottage one by English foodie Hugh Fearnley-Whittingstall, except: no lard, more herbs, and just one pot!

Pork belly rillon recipe

Like many a bachelor, I love the chilli. The cayenne is a familiar favourite. Included amongst the roast vegetables, it is a taste sensation. Dried cayenne, fried in good oil, is a blessing on the tongue. The caramelised flavours of the pork, garlic and chilli make this dish a BF favourite!


Ingredients

  • 1 kg boneless pork belly, with skin on
  • 3 cloves garlic
  • 3 dried cayenne chilies
  • 1 cup water
  • 1 cup red wine
  • Sprigs: parsley, sage, rosemary and thyme
  • Salt
  • Pepper
  • .25 cup olive oil

Method

  • Preheat oven to 200˚
  • Cut pork into large chunks - for a 1 kg piece, that would be 10 to 12 pieces
  • In a heavy based, oven proof pan or casserole dish, heat oil until it just begins to smoke
  • Add the chilies whole
  • Add pork chunks skin down, cooking 2–3 minutes on all sides so they get nice and brown
  • Cut the woody end of the garlic and crush with the flat of a kitchen knife
  • Strip the rosemary leaves off the woody stem, leaving the other sprigs whole
  • When pork is browned, toss in herbs and garlic, and season with salt and pepper
  • Add wine and water
  • Bring to a simmer
  • Turn the pork skin side down
  • Place pan in oven, turning the pork skin side up after 10 minutes
  • After another 10, drop heat to 150˚ and cook for 2 hours
Serve hot with steamed potato and veggies, or refrigerate for sandwiches or later re-heat and re-brand.
Tonight, I sliced the pork thinly, and stirred into steamed rice with fresh ginger, baby spinach leaves and dark soy sauce.

Sunday, January 27, 2013

Barbecue baked sardines with thyme and ginger

They will always be Greek to me - Σαρδέλες.

Sardines (Sartheles in Greek - also known as pilchards) are the seafood bargain of the century. They are a schooling fish, sustainably managed, and taste great. You can generally buy them for less than $10 a kilo. They are quick to clean and gut. And did I mention? They taste great!

Ingredients

  • 8 sardines (or 3–4 per person)
  • 2 cloves garlic, crushed
  • 1 tablespoon grated ginger
  • 1 lemon juiced
  • 1 lemon grated zest
  • 1 tablespoon olive oil
  • 1 sprig thyme plus 2 for garnish
  • 4 dried chilli

Method

  • Clean the sardines and place in a bowl or tray
  • Place one sprig of thyme in the cavity of each sardine
  • Mix the rest of the ingredients (except the last sprigs of thyme and the dried chilli) in a bowl
  • Pour mixture over sardines
  • Add chilli and extra thyme
  • Cover and place in refrigerator for 2 hours
Now, to cook, you can use your oven if you like, preheated to 200˚, but I use my barbecue.

Preheat your barbecue with all burners on and the hood down. While the barbecue is warming, take a roasting pan and coat it with olive oil. Place your sardines on the tray, and pour over the marinade juices.

We are using the convection method here, so turn off once side of the barbecue burners, and place your tray on the side that is turned off. Place the hood down, and cook for 20 minutes.

Serve with fresh tomatoes, homemade hummus, and Lebanese bread. I get my Leb bread from Baalbek on Canterbury Road because they make a wholemeal variety which is not heavy and stodgy as this can sometimes be.

A note on the grating of ginger


Nothing beats a bamboo ginger grater. You lay it down flat, and scrub the peeled ginger back and forth over it. No barked knuckles, and no waste, as you just give the grater a couple of taps and the chopping board, and all the ginger comes out nicely from between the grooves.

Friday, January 25, 2013

Barbecue salad!

A beautiful summer morning. 20˚ now, 30˚ later. Fire up the barbecue for a late lunch.

This includes a moral dilemma. I reserve the grill for meat and the plate for veggies out of courtesy to my veggie friends - but this time I want to cook bacon on the plate. WHAT CAN I DO?

I take out a baking tray and give a good dose of olive oil. This will sit on one side of the BBQ plate, leaving the other side to crisp up the bread.

Recipe: Barbecue salad with crispy bread, bacon, and 2-minute egg

Ingredients

  • Double handful English spinach
  • 1 ripe tomato
  • 1 rasher bacon
  • 1 piece Lebanese bread
  • 2 eggs
  • 8 Calamata olives
  • several sprigs basil and parsley

Method

Heat BBQ, placing oiled baking tray on the hot plate.

Place eggs in a saucepan of cold water. Bring to a steady boil, turn heat down to a gentle boil, and cook for 2 minutes. Place eggs in a bowl and refrigerate.

Using tongs, dip the piece of Lebanese bread into the oil, then place on the hot plate. About a minute each side. Remove to a plate.

Slice tomato in half, and place cut-side down on the tray. Lay out rasher of bacon on the tray. Cover with BBD hood. Turn each after 3–5 minutes.

Place tomato and bacon in the fridge with your eggs.

[Now it is time to get on with your morning. Go shopping, go for a cycle, take the kids to the pool, whatever]

Peel the eggs and slice them. They should be soft in the middle, but not runny.

Break off bits of the Lebanese bread and distribute evenly around a salad bowl. Toss in torn spinach leaves.

Cut tomato and bacon into small pieces, and add to bowl. Add olives. Garnish with basil and parsley.
I didn’t use a dressing on this, because I figured the tomato juices would do the job. And they did!

Tuesday, January 8, 2013

Missing, making, and bringing the bling

In the world of the contemporary bachelor father (ref not-so contemporary family sitcom of the same name), missing your children is inevitable.
For bachelor food, there are two main remedies. First is prepare something to set aside for their next stay (stock is a favourite). Second is to make something for yourself to give some bling to your interim meals.
On Sunday afternoon, out in the garden (such as it is), my eldest son remarked that the chilli and basil plants were getting a little heavy.
After saying goodbye to them (the children, not the chillies), I swung into action.

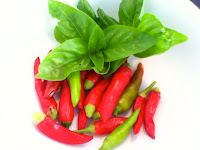
chilli and basil

Recipe: Chilli paste

This is an extremely tasty and versatile bit of bling. It's based on one I used to do about 15 years ago when, above the cooktop, I used to hang a sign "put the rice on now" because meals whipped up using this little gem were ready so quickly.

It works very well with poached fish, and fried with coconut cream as the basis of a stir-fry. Or you can just add it to stuff.

Ingredients

15–20 bird’s eye or tabasco chilies
1 large red capsicum
4 tablespoons cider vinegar
1 tablespoon peanut oil
1 teaspoon palm sugar
5 basil leaves
3 curry leaves
2 teaspoons salt

Method

Roast lightly oiled capsicum (preferably over a barbecue). Turn when skin begins to blacken and bubble. Once blackened on all sides, remove to a plastic bag, seal and set aside until cool enough to handle.
Roughly chop remaining solid ingredients, and place in blender with the vinegar, oil, salt and sugar
Remove capsicum, peel off the skin and remove seeds. Roughly chop, then place in the blender with the rest of the ingredients. Blend until smooth.
Remove to a small saucepan, bring to boil and simmer until mixture is reduced by about 1/3.
Place in a sterilised jar, seal and refrigerate.

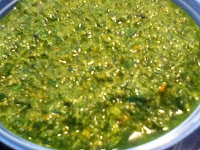
mixed herb pesto

Recipe: Mixed herb pesto

Ingredients

3 big handfuls basil leaves
Several sprigs each: Sage, Parsley, Oregano
.25 cup almond slivers
1 clove garlic
Juice 1 lemon
4 tablespoons olive oil
1 tablespoon grated parmesan

Method

In a dry frying pan on medium to high heat, fry almond slivers until they are golden. Careful, once they start to go, they blacken quickly if you let them.
Once done, remove to a bowl. Now pop the unpeeled garlic clove into the pan and brown in on each side, so that it is soft and starting to caramelise in the middle. Then let it cool, and peel.
Put all the ingredients a little at a time into a blender, using enough oil to keep the contents churning. The amount of oil you need will vary according to the moisture content of the basil leaves.
Spoon into a sterilised jar, seal and refrigerate.