Sunday, December 24, 2023

A Christmas pickle - brinjal all the way

Merry Christmas fellow bachelor dads and mums, brothers and sisters. Christmas is complicated, right? 

In Australia, it’s summer and a wonderful time for garden and grocery produce - basil, tomatoes, chillies, and eggplants. 

I have a basil pesto recipe from a previous summer. Here is my version of a South Indian brinjal pickle to liven up a curry or steak. 

Ingredients

1 medium eggplant (about 400g)
1 cayenne pepper 
2 cloves garlic 
3 tbsp peanut or canola oil
1 tsp salt


— Toasted spices —
1 tsp mustard seeds
1 tsp cumin seeds
1/2 tsp fenugreek seeds
1/2 tsp black pepper

1/2 tsp sweet paprika
1/2 tsp turmeric
1/3 cup apple cider vinegar
2 tbsp palm sugar
4 curry leaves 

Method 

1. In a small saucepan, toast the spices over medium heat.

2. While the spices are toasting, cut the eggplant in to slices, then half-centimetre cubes, roughly chop the chilli and garlic.

3. Once the spices are fragrant, remove them to a mortar. (You know when they’re ready by testing the fenugreek which are rock-hard before toasting, and pound to powder easily after toasting.) With a pestle, grind the spices to a rough powder.

4. Add the oil to the saucepan, still on a medium heat, then add the eggplant, chilli, and garlic. Fry gently until the mixture softens and the juices come out. Fry until the juices evaporate and the mixture starts to stick. Don’t let it burn.

5. Add the toasted spices, turmeric, paprika, curry leaves and salt. Stir until the eggplant is thoroughly coated with the spices.

6. Add the vinegar and palm sugar and continue frying until the liquid is about 90% gone.

7. Spoon the mixture into a sterilised jar, seal it and put straight in the fridge.

Yields about 350g

Wednesday, August 23, 2023

You can’t beat beetroot


In-season if winter and early spring, beetroots are great for roasting, for casseroles, soups, salads and dips. It’s also easy to pickle and set aside for summer sandwiches and burgers.

Pickled beetroot

Ingredients

  • 4 beetroots large (600-800g total)
  • 2 tablespoons olive oil
  • 3/4 cup water
  • 1 1/2 cups white vinegar
  • 3/4 cup sugar
  • 1/2 tsp peppercorns, coarsely cracked 
  • 4 curry leaves
  • 2 whole cloves
  • 1/2 tsp mustard seeds
  • 1/2 cinnamon stick
  • 1 tsp salt

Method

Preheat oven to 160º C

Wash beetroot thoroughly. Place in a roasting pan and drizzle with olive oil. Roast, covered, for 1-2 hours, or until al dente (cooking them in boiling water is quicker, but the flavour isn’t quite as good).

Remove from oven to cool.

Place all other ingredients in a saucepan and bring to the boil.

Simmer for 5 minutes.

Remove the cinnamon and cloves.

Once beetroots are cool, remove skin and cut beetroot into slices - I like about .5 cm.

Pack beetroot into hot, sterilised jars.

Use some of the pickling liquid to deglaze the roasting dish and return the liquid to the saucepan. 

Top up the jars with vinegar mixture, evenly distributing the remaining whole spices.

Seal and store in a cool place.

Yields about 4 jam jars of yummy beetroot pickles.

Saturday, April 8, 2023

My Asian pantry

My journey into cooking Asian cuisines began with buying a copy of The Complete Asian Cookbook by the great Charmaine Solomon in the 1990s. I still cook from it. But of course these days I also plunder various YouTube channels.

Last night I made a family dinner of a westernised restaurant favourite - Sesame Chicken. I followed Mandy’s method from Souped Up Recipes. All the shops are closed on Good Friday, so I was pleased to see I had everything in my pantry that the recipe called for.

And this got me thinking about my must-haves from my local Asian supermarkets.


Sauces

  • Light soy sauce
  • Dark soy sauce
  • Sweet soy sauce (kecap manis)
  • Fish sauce
  • Oyster sauce

Always check the ingredients list

Choosing

As with all the foundational sauces, vinegars and cooking wines, you start by looking at the ingredients. The fewer ingredients the better.

Soy sauce is soy sauce - why would it need flavour enhancer this or colouring that? Unless they’re using low quality soy… For soy sauce, also look for ‘naturally fermented’ on the label.

There are grades to most of these - premium, superior and whatnot. The most impactful on the flavour is ‘premium’ for oyster sauce. Premium oyster sauce is much, much tastier than its regular counterpart, in this case (top image) brand Lee Kum Kee.

Wines and vinegars 

  • Dark cooking wine (shaoxing - also spelled shao hsing)
  • White cooking wine (shiwan from Pearl River Bridge is good)
  • White rice vinegar
  • Black vinegar

Choosing

Follow the ingredients rule. The wines will often come in salted or unsalted versions. They’re both fine. The ingredients of my white cooking wine are: water, rice, salt; while the darker is: water, rice, wheat. What you don’t want to see is ‘alcohol’. That means it’s not wine at all, but a bunch of flavouring with alcohol added.

Black vinegar: White rice vinegar can be satisfactorily substituted with European white vinegar, but there is no substitute for delights of Chinese black vinegar.

I’ve found products labelled ‘black vinegar’ to be particularly susceptible to imposters. One I bought without checking had about 12 ingredients which, from memory, included carrots. Just a cocktail of flavours made to mimic the real thing. Look for: water, black glutinous rice, wheat, salt.

Oils

  • Canola oil
  • Peanut oil
  • Sesame oil
  • Ghee
For general use, I like canola oil best. It does the trick, and its flavour is unintrusive. It’s also safer if you’re not sure of the allergies of the people you’re cooking for. Peanut oil has a stronger flavour, and it just depends on how I’m feeling.

With sesame oil, just remember a little goes a long way. It’s not a cooking oil, it’s an flavouring oil and great for dipping sauces. In a stir fry - add it last. Right at the end. Just before serving.

As with black vinegar, there is no substitute for ghee. A South Indian curry made with ghee will taste sooo much better than one made with vegetable oil.

Other stuff

  • Palm sugar
  • Chilli bean sauce (toban djan)
  • Chicken bouillon powder
  • MSG
Some might say that brown sugar is an acceptable substitute for palm sugar. They are wrong. It’s not terrible. But palm sugar is much better in Thai, Indonesian and Filipino cooking. Toban djan is just great stuff - a staple of Schezwan food  A little of this can do wonders for a basic veggie stir fry.

The absence of chicken bouillon is why so many people ask - why doesn’t my fried rice taste like takeout?

MSG is a much maligned flavour enhancer, but the serious negative health effects it’s been blamed for are debunked. It has been used in many Asian cuisines for more than a century.

Go-to channels

Chinese cooking demystified 

Steph and Chris explore the many cuisines of China. Often the recipes come with a little social history.

Souped up recipes

I’ve followed this since Mandy first moved from China to South America (she’s now based in North America) in search of a warmer climate to help her arthritis. Again, mostly Chinese, including ‘international’ Chinese.

School of wok

Jeremy is a very charming presenter. His technique of arranging stir fry ingredients in a ‘wok clock’ changed the way I cook.

Pailin’s kitchen

In the late 1980s, the Pailin (no relation), on Parramatta Road, was at the forefront of the explosion of Thai restaurants in Sydney. So I’m fond of that name. 

Also known as ‘Hot Thai Kitchen’, it includes neighbouring cuisines. As Pai says - let’s get started!

Sunday, March 19, 2023

Smashed patty cheeseburger


I’ve had the flu for the last couple of weeks and only just coming out of it this weekend (I hope). Streaming The Menu during the week made me want to lift my cheeseburger game.

And it ruined my life. I will never buy a burger again.

These are ingredients and directions for 1 burger. Scaling up to 2, 4 or 8 or 12 is simple ingredients-wise. The logistics is the trick. 

It all happens very quickly, so you’re much better off doing 4 beautiful burgers, followed by another 4, then another 4, rather than doing 12, serving them all together with only 4 of them properly cooked.

Doing 4 burgers (8 patties) is about the limit for 1 pair of hands (or at least for clumsy ones like mine) beyond that, you’ll need to enlist the troops so you can concentrate on smashing those patties.

Fat hack

Burger mince, especially when you’re smashing the patty rather flaming it, needs at least 20% fat to keep it moist and getting that gorgeous crust.

This is no problem if you’re buying from a butcher. But not so easy from a supermarket where often 17% is the highest fat content available.

Not to worry. You have options.

You can oomph it up by chopping up some bacon fat, or adding slivers of dripping. In my example I had home-made beef stock in the freezer and scraped off some of the clarified fat and mixed it into my supermarket-source beef mince.

Ingredients

1 65g brioche bun
110g beef mince, at least 20% fat
2 tbsp vegetable oil
2 slices American cheese
3 very thin slices tomato
2 leaves baby cos lettuce, halved
1 eschalot bulb, thinly sliced
1 tbsp very thin slices cucumber pickles
1 tsp mayonnaise and wasabi sauce
1 tsp chilli and tomato chutney

For assembly

1 cocktail skewer


Method

This is 90% assembly and 10% cook. But the 10% cook is very, very important.

To get the assembly right, room temperature is your friend. The lettuce - fresh, crunchy, room temperature; the tomato thinly sliced, juicy, room temperature etc.

Having everything ready for assembly lets you concentrate on the cook.

On one board, lay out your assembly items: lettuce, tomato, pickles.

On another board, lay out your cook items: two patty balls 55g each, sliced eschalots, cheese

Halve and lightly toast the bun. I do this under a grill. I don’t want the buns to be browned, but to be crisp enough to hold it’s crispness once the juices begin to flow.

Once they’re ready, apply the salad sauce (mayo and wasabi) to the bottom bun and the bbq sauce (chilli chutney) to the top bun.

Now you’re ready to cook.

There’s really no timing involved here other than - the moment you’ve done one step, move to the next step.

Put a non-stick frying pan on a high heat. Add the oil. Once the oil starts to smoke, add the first patty and squash it down with a steel spatula to about .5cm thickness. Quickly, do the same with the second patty.

Season the top side of the first, add the sliced onion. Do the same to the second. Flip the first, keeping as much of the union underneath the patty as you can. Do the same with the second.

Season the new upside of each. Top each with a cheese slice. Remove from heat. Stack first on top of the second.

Avengers - assemble!

Bottom bun
(Mayonnaise and wasabi)
Lettuce
Tomato

Patty and cheese stack

Pickles
(Chilli sauce)
Top bun

Press the burger down gently, so that the juices cascade through. Gravity is also your friend.

Spear with a cocktail skewer, and you’re ready to chow down.

Saturday, March 11, 2023

Favourite Pesto Recipe


A hot first couple of weeks of March (next week in Sydney will be in the mid 30s) has meant summer garden produce continues to kick on.

In my fridge I’ve got 4 jars of sweet and hot chilli sauce, 3 jars of chilli and tomato chutney and 2 jars of pickled chilli slices.

The key to a good home harvest is harvesting. It reduces the risk of pest attack. You don’t want your sweet basil to flower, but you do want your cherry tomatoes to flower.

Today was basil harvest.

Just two plants in one pot has kept me going since November.

I’ve pestoed lots of times. This one isn’t exactly authentic, but it’s the recipe I like the most.

The following yields about 300ml or 260g


Ingredients

  • 100g basil leaves, about 2 cups packed 
  • 40g pine nuts, about 1/4 cup, lightly toasted
  • 2 cloves garlic, peeled and lightly browned
  • 1 green chilli
  • 25g, about 1/3 cup, fresh grated parmesan cheese
  • 1/3 cup extra virgin olive oil
  • 1 teaspoon salt
  • .5 teaspoon white pepper
  • 1 lime, juiced

Method

Heat a frying pan over medium heat. Toast pine nuts and garlic cloves until golden, tossing occasionally in the pan. Add the pine nuts to the bowl of your food processor along with all the other ingredients

Run the processor until you achieve and even, slightly coarse paste. You will need to pause a couple of times and adjust the contents with a spatula.

Yields about 260g pesto, about 300ml

Storage: this pesto can be stored in a sterilised, air tight jar and refrigerated for a couple of weeks.

Saturday, February 25, 2023

Slow cooked, sticky spare ribs

It’s been a long time between recipes!

My boys are now young men and it’s rare that the three of us sit at the dinner table together.

If you have a roasting pan with a lid, this one is a beauty - quick to prep, slow to cook, and all done in the pan.

Ingredients

1 kg rack of beef spare ribs (pork is also very good)

200g eschallots, peeled and separated into individual bulbs. Slice the bigger bulbs in half. 

Rub

  • 1 tbsp brown sugar
  • 2 tsp paprika
  • 1 tsp garlic powder
  • 1 tsp onion flakes
  • .5 tsp cumin powder
  • .75 tsp mustard powder
  • 1 tsp salt
  • .5 tsp white pepper


BBQ sauce

  • 2 cloves garlic, minced
  • .5 cup apple cider vinegar
  • 1.25 cups ketchup or tomato sauce
  • .25 cup brown sugar
  • 2 tsp each white pepper, onion flakes, mustard powder
  • 1 tsp cayenne pepper
  • 2 tbsp Worcestershire sauce
  • 1.5 cups water

Chopped parsley or chives for garnish

Method

  1. Preheat oven to 160°C
  2. Mix rub ingredients in a small bowl
  3. Rub in the mixture to all sides of the rib rack
  4. Mix BBQ sauce ingredients, except water, in the roasting pan. Then mix in water
  5. Place ribs in sauce, turning to coat. Remove, then drop in the eschallots. Put the rib racks on top, arranging them bone-side down, sort or arching over the eschallots.
  6. Cook covered for 3.5 hours
  7. Remove from oven, baste with sauce and return, uncovered, to the oven.
  8. Cook for 30 minutes, basting with the sauce again halfway through
  9. Remove ribs onto serving plate. The surface of the ribs will be caramelised and sticky. The eschallots will be soft explosions of sweet, savoury yumminess.
  10. Mix sauce to bring together, adding a little water if necessary to produce a pourable sauce.
  11. For serving, the ribs will be falling apart and so easy to separate 
I served this with linguine and steamed broccolini. There were no leftovers. None.

These became sweet and savoury little explosions of yumminess


Saturday, October 2, 2021

Hearty white bean soup

Back trackin'


When I started this blog so many years ago, my boys were 7 and 9. The trick was to find pretty simple meals that they'd love (or at least like enough to try new things). Now that are 17 and 19 and gigantic! Which I suppose means the meals were ok. Now the question is - how to fill those bottomless bellies?

This is a tasty, filling soup or stew that works great as a lunch, side or main.

If I’m ladling over pasta, I have it more as a stew and reduce the water by 2 cups. If I’m serving it with crusty bread and a salad, the consistency I like is more like a soup.

If I were to do a vegetarian version, I’d chop and sauté a turnip, then remove and add it back in again with the chopped kale.

In this pic, I didn’t have any feta in the fridge, so used pecorino instead. This is an Italian dish, so black pepper would be more authentic I guess, but I like white pepper here.

Ingredients 

2 cups (375g) dry cannellini beans
4 cups water (for soaking)
2 or 3 Italian pork sausages with garlic and fennel, bratwurst also works well
2 chopped brown onions
2 cloves chopped garlic (reduce if your sausages have lots of garlic)
⅓ cup dry white wine
1 teaspoon freshly ground white pepper
¼ teaspoon red pepper flakes
1 bay leaf
2 cups veggie or chicken stock
6 (or 8) cups water
1 teaspoon salt, plus more to taste
4 cups chopped kale (or other leafy green)
1 tablespoon extra-virgin olive oil, or to taste

To serve

Crumbled feta
A few pinches red chilli flakes
A few splashes of balsamic vinegar 
Chopped parsley

Method


1. Soak beans in cold water overnight.

2. Drain beans (retaining the liquid) and set aside.

3. Make a cut down the center of each sausage and peel off the casing. Transfer sausage into a dry, cold, 4 litre soup pot. Turn the heat to medium-low. You want to render out the fat. Once it starts to sizzle, raise the heat to medium and brown the sausage, breaking it up into small pieces with a wooden spoon, 5 to 7 minutes. Cook and stir until juices start to caramelise and stick to the bottom of the pan, creating a fond, 3 to 5 minutes.

4. Add onion and garlic and stir to coat in the rendered sausage fat. Add a little olive oil if necessary. Cook until onion starts to turn translucent, about 5 minutes. Add white wine to deglaze the pot. Add black pepper, dried chillies, bay leaf, and water.


5. Add drained beans, increase heat to high, and bring to a boil. Once boiling, reduce heat to medium-low and simmer for 30 minutes. Add salt and continue to simmer until beans are tender, about 30 more minutes. Taste beans to be certain they are perfectly cooked.

6. Smash about 1/4 of the beans with a potato masher to give the soup a creamy texture. Stir in chopped kale, increase heat to medium, and cook until tender, 10 to 15 minutes. The time will depend and the greens you choose. If you choose English spinach, for instance, this can be done one minute before serving. Taste and adjust salt.

7. Ladle hot soup into bowls, drizzle with olive oil, and sprinkle with feta and a pinch of chilli flakes and chopped parsley.

Monday, April 27, 2020

Beef back ribs and risoni

Slow cooker - your work-from-home wonder

Working from home during this COVID–19 lockdown means knocking a lot of well-worn systems out of whack.

If you’re working from home with kids at home, let me suggest dusting off the crockpot (slow cooker). You can get dinner sorted between breakfast and log-on. Then all day the aroma will be developing that says two things: yum; and don’t panic.

And I just feel tremendously carnivorous when I’m frying beef in my pyjamas!

Ribs and risoni

You could just as easily use noodles, laying the ribs over a bed noodles and ladling the juices over that. But I had some risoni in the pantry, so decided to put it to use. You could also use pork ribs. Adding some black vinegar and Korean chilli flakes is also worth a try.

This is simple and very tasty recipe. Serve with steamed greens and salad.

Ingredients

  • 1.5 kg beef back ribs
  • 1 medium onion
  • .25 cup kecap manis (sweet soy sauce)
  • .5 cup light soy sauce
  • .5 cup vegetable stock
  • 2 tablespoons brown sugar
  • 1 cup risoni
  • Enough olive oil to cover your frying pan

Method

Cut the ribs into sections that will easily fit in your slow cooker. Peel and quarter the onion.

Heat the oil in a frying pan until the oil just starts to smoke, then brown the meet and onion in batches and remove to the slow cooker.

Mix the liquid ingredients in a bowl, then add the sugar and stir until it is dissolved.

Pour over the meat and onion.

Pop on the lid, turn on the cooker, and your job is done for at least three hours.

After three hours or so, move the meat around bringing the bottom bits to the top.

Now you’re done for two hours.

After two hours or so, remove the meat and bones to a plate and add the risoni, spreading it evenly across the base of the cooker.

Return the meat and bones to the cooker and cover.

After one hour, the risoni will have absorbed all those lovely juices and still hold good shape and texture.

The meat will have fallen off some of the ribs, and these can be discarded, as all their flavour has been drawn out.

A few minutes to steam some veggies or assemble a salad (or both) and you’re done!

Wednesday, April 15, 2020

Channel that

As we’re stuck inside, I thought I’d share some of my favourite YouTube channels to bring restaruant food into your kitchen, or just do home-cooked meals well.

School of Wok

A recent discovery is the School of Wok which has reawakened my love of Asian street foods and given me some very helpful hints on wok management.

Recipe - School of Wok

Here’s one I made earlier this week - Massaman Curry

John Kirkwood

As his delightful intro tells us - John is a retired cook from the north east of England. And I just love to bits how he adds “in the UK”.

This is hearty food with lots of bread styles, roasts, pies and desserts.

Recipe - Eve’s Pudding

I’ve included a version of this one in a post about a year back. Here’s the real thing!

Souped up Recipes

Mandy is our host. The channel’s description asks us to join us on her YouTube journey, and empty our stomachs. OK…

Focused on Chinese dishes she was brought up with and going since only 2017, I’ve had lots of fun and learnt heaps. I’ve generally emptied my stomach in a different context.

Recipe - Sesame Chicken

From her “Better than Takeout” series. The one I tried first and still love.

Food Wishes

The delivery style can wear thin, but I love pleasure here in doing simple things well.

Recipe - Potatoes Romanoff

As we see the cinema release of Black Widow recede into the future (is that a thing?). Let’s just eat stuff.

Marion’s Kitchen

Australian foodie Marian Grasby. Clearly described instructions with the occasional presentation idea that even a klutz like me can attempt.

Recipe - beef Broth an Pho

This is Marion’s isolation tip. Over Easter I made batches of beef and chicken stock. Very calming. Put a few containers in the freezer and look forward to a week where every meal comes with a punch of flavour and a caress of goodness.

The Katering Show

Just saying…

Sunday, November 17, 2019

No-fry moussaka

The most famous Greek dish involves a lot of hands-on frying and, if we don’t get the temperature right, if can end up very heavy and oily.


This is an oven-based version that we assemble in five 20-minute stages.
Aside from the roasting pan, we use a frying pan for the ragu and a saucepan for the bechamel. That’s it.

It’s very reheatable, very work-lunchable and totally tops.

Ingredients

Bechamel

  • 100g plain flour
  • 100g olive oil
  • 750ml milk
  • 2 tablespoons grated pecorino
  • 2 egg yolks
  • 1 teaspoon ground nutmeg

Ragu

  • 500g lamb mince
  • 1 cup all purpose tomato salsa (if we don’t have such a thing in your fridge at all times, use a can of chopped tomatoes and add herbs and garlic)
  • 3 cloves
  • 3 bay leaves
  • 1 cinnamon stick

For the roasting pan

  • 1 sliced onion 
  • 3 sliced potatoes 
  • 1 sliced egg plant 
  • 1 sliced zucchini 
  • .5 cup olive oil 
  • Salt, pepper, thyme, crushed garlic

Method

Preheat the oven to 200º C
Lightly oil a roasting pan about 30cm by 20cm
For the slicing, I use a mandolin (mine’s a V-slicer) as the final product benefits from being evenly cooked.

Wash, halve and slice the potatoes (I don’t peel them - I don’t see the point)
Peel and halve the onions, and slice them.

Oven 1

Place the potatoes and onions in an even layer in the roasting pan with crushed garlic, salt, pepper and thyme.

Drizzle with olive oil and place in oven for 20 minutes.

While this stage is happening, get onto our ragu.

Get olive oil in our frying pan to just start smoking, then add the lamb mince.

Brown the mince, breaking it up with a wooden spoon. There should be some caramelisation and crunchy bits - we are browning, not greying.

Add the salsa and make sure we scrape up all the crunchy stuff from the bottom of the pan.

Add bay leaves, cloves and cinnamon

Drop the heat and simmer.

This needs to be reduced down to a ragu - a dryish sauce - not runny. Don’t worry, there is plenty of time.

Top and tail, and slice the egg plant.

Remove the roasting pan (the potatoes should be browning and slightly bistering).

Oven 2

Add the egg plant in an even layer with crushed garlic, salt, pepper and thyme, and drizzle with olive oil.

Return to oven for 20 minutes.

Bechamel time!

Add the olive oil to the saucepan and bring to a medium heat.

Stir in the flour to make the roux (the basis of our white sauce).

We are looking for a smooth consistency and the right colour.

It starts faily pale, then turns golden, and then a deep golden - and that’s where we stop it. Before it
becomes choclaty.

Remove from the heat and add the milk all at once.

Using a whisk, stir until the mixture is smooth, then return to the heat and bring to a gentle boil, stirring continuously, until the mixture thickens.

Remove from heat.

Stir in egg yolks and pecorino.

Oven 3

Remove pan from oven and add the sliced zuccini, crushed garlic, salt, pepper, thyme and drizzle with olive oil.

Oven 4

Remove pan from oven. Remove cloves, cinnamon stick and bay leaves from ragu and spread the ragu evenly over the top.
Return to oven for 20 minutes.


Oven 5

Spread then bechmal evenly over the top, and sprinkle with some more grated pecorino. Return to the oven.

Now we have to pay attention.

Set the alarm for 10 minutes.

We don’t want it to burn - but we don’t want it to be blond.

What we are after is some deep, chocolaty brown blistery areas.

After 10 minutes, rotate the pan and continue wer cook until it looks just right.

Remove from the oven and let rest for 10 minutes.

Eat


Serve with a big, green salad.

Watermelon and ouzo is optional (but not really).


Tuesday, April 2, 2019

Condimentally yours

What to do with the last of the summer veggies and fruit? Pickle time!

Here’s one for eggplant (aubergine) that I had fun with on my last no-child weekend. It’s a good time of year for this as young ginger is widely available in Asian grocers.


Ingredients 

  • 3 onions, chopped
  • 100g chunk young ginger, peeled and finely chopped
  • 2 tbsp peanut oil
  • 1 tbsp black mustard seed
  • 1 tbsp ground cumin
  • 10 curry leaves
  • 1 tsp dried chilli flakes
  • 3 tbsp tomato purée
  • 3 tbsp tamarind paste
  • 1kg egg plant, diced
  • 150g currants
  • 200g palm sugar
  • 250ml apple cider vinegar
  • Salt to taste

Method

Put the onions, ginger and oil in a large saucepan or wok and gently cook for 15 minutes until soft. 

Stir in the spices and curry leaves and fry for a 5 minutes, then add the tomato purée and tamarind and fry for 5 minutes more.

Stir in the egg plant, currants, sugar and vinegar. Heat gently until the sugar has dissolved, then simmer for 30 mins until the mixture has thickened and egg plant is soft. 

Remove from heat and leave for 10 mins, then spoon into sterilised jars and seal. 


The pickle can be eaten straight away and keeps if properly sealed for weeks.

Thursday, February 28, 2019

We belong together

I still love exploring Greek flavours and food styles, and combining them with the Asian cooking that consumed me in my first bachelor shift.

Here is a meal of spiced lamb rissoles, fried zucchini with balsamic vinegar dressing, yogurt and mint sauce, with lime and saffron rice pilau.

Throughout this, the mint, chilli, citrus all have fun playing nicely with their foodie buddies.

Let’s start with the easy bit - the sauce.

Yogurt and mint sauce

Ingredients

  • 200g Greek style yogurt
  • 2 tbsp lemon juice
  • 4 tbsp chopped fresh mint
  • 1 tsp ground black pepper
  • 1 tsp ground coriander seeds

Method

Combine ingredients in a bowl. Add some extra ground coriander seeds last. Cover and refrigerate until needed.
Zucchini with balsamic vinegar dressing

Ingredients

  • 4 medium zucchinis
  • 2 tbsp lemon juice
  • 2 tbsp balsamic vinegar
  • 1 tbsp Korean chilli flakes (“red pepper flakes”)
  • 1 tbsp maple syrup
  • .5 cup halved cherry tomatoes
  • .25 cup torn mint leaves
  • 4 tbsp olive oil

Method

  • Heat oil in a frying pan on medium-high
  • Top and tail the zucchinis and quarter them, halving them long first and short second
  • Once the oil is hot, fry the zucchinis cut-side down for three minutes, then turn for another three
  • Remove the a plate and keep warm in the oven
  • In a small bowl, combine lemon juice, vinegar, chilli flakes and syrup, stirring to dissolve the syrup
  • When read, serve zucchinis with scattered tomatoes, mint leaves and a good splash of the dressing.

Lime and saffron pilau

Ingredients

  • 4 tbsp olive oil
  • 2 cups basmati rice
  • 3.75 cups vegetable or chicken stock
  • 1 onion, finely chopped
  • 1 clove garlic, minced
  • 1 lime roughly chopped
  • .5 tsp saffron strands soaked in about a tbsp warm water
  • 2 tbsp slivered almonds
  • 2 tbsp currants
  • 1 tsp salt

Method

  • In small to medium saucepan, heat the low to medium (no oil). Add the almonds, tossing every minute or so until golden brown. If any get burnt, chuck ’em. Remove almonds to a small plate or bowl
  • Add oil to pan and bring to low to medium heat then sauté the onion for two minutes, then garlic for another two
  • Add the rice and sauté for 5–10 minutes until translucent
  • Add lime and saffron (including the water it’s been soaking in), stir and sauté for another 2 minutes
  • Tip the mixture into your rice cooker (this is against my general principle of not using two pots when one pot will do - but I love my rice cooker…)
  • Add the stock and salt, cover and set to “cook”
  • Once cooked, turn the cooker off and stir through the almonds and currants
  • Cover until ready to use

Spiced lamb rissole

Ingredients

  • 500g Lamb mince 20% fat
  • 1 Small onion finely chopped
  • 2 to 3 chilli peppers, seeded and finely chopped
  • 2 cloves garlic, minced
  • 1 egg, beaten
  • ½ tsp Salt
  • 1 tsp garam masala
  • 4 tbsp vegetable oil

Method

  • As with all food prep, especially when it involves meat, take the ingredients out of the fridge early so that they are close to room temperature
  • Combine all the ingredients except the oil in a bowl and mix evenly
  • Divide the mixture into six even balls, then flatten into patties
  • Bring oil to a medium to high heat in a frying pan
  • Fry patties two minutes each side

Sunday, February 24, 2019

Sausage rolls rough puff

This is a delicious, fun recipe based on this one by Gill Meller https://youtu.be/oKWNqzG0kko

A warning though - the amount of water in the ingredients for the YouTube video and the River Cottage website version (as noted by one among hundreds of positive comments) is way wrong. I’m guessing a zero got dropped off. Follow my recipe instead!

I know the recipe looks kind of long, but it’s really quick and simple once you get going. Pastry part 1 takes no more than 10 minutes and part 2 just five. And the filling is even simpler - stick everything in a bowl and mix it up.

Ingredients

Filling

  • 1kg finely minced pork, fairly fatty
  • A small bunch of chives, finely chopped
  • 1 tsp each chopped thyme, lemon thyme, mint leaves
  • 1 tsp chopped lemongrass stalk
  • 1 long chilli, seeded and chopped
  • 75g dried breadcrumbs
  • 1 tsp salt
  • Freshly ground black pepper

Pastry

  • 175g unsalted butter, chilled and cut into small cubes
  • 350g plain flour (about 2.5 cups)
  • A good pinch of salt
  • About .5 cup iced water, to mix

Assembly

  • Egg wash (1 beaten egg mixed with a tbsp of milk) for the seal and to glaze
  • 1 tsp each fennel, cumin, sesame seeds.
  • Ground salt

Method

Pastry part 1

In a mixing bowl, combine the flour, salt and butter cubes.

Add water a little at a time until the dough comes together. I find the amount is between half and three quarters of a cup.

Roll out the dough on a floury work surface until its roughly a rectangle about 40cm by 20cm.

To get a layered and fluffy pastry, fold it longways into thirds by taking one end and folding it into the middle, then the other end folding on top of that. Make a quarter turn, and now you have a new long side, and you roll it out again.

Do this another three or four times, gradually making your rectangle shape more and more even.

Cover with cling wrap and pop it in the fridge to rest for 1 hour.

The filling

Combine the filling ingredients in a bowl and mix through evenly.

Cover and leave at room temperature for 30 minutes.

Pastry part 2

Take the pastry from the fridge and leave at room temperature for about 15 minutes until it starts to relax (you don’t want to be rolling it when it’s all stiff straight from the cold)

On a floured work surface, roll it out into a long rectangle about 2mm thick and about 20 cm by 80 cm.

Assembly

Grab about half the filling mixture and, starting at one end shape the mixture towards the middle, and about 2cm back from one of the long edges. It doesn’t have to be super even - just so long as there aren’t any gaps.

Now take the other half of the mixture and, starting from the middle, work it towards the other end.

Brush the egg wash along the long, narrow edge of the pastry.

Now fold the other edge over so that it holds the mixture snugly, tucking the pastry in towards the mixture where the two sides meet.

Trim at each end, and down along the side. I always retain the strips of pastry and any bits of filling that stick to the knife and give it to the kids to make into shapes. They’re 14 and 16 now - and they still like doing this.

Your great big sausage roll should be 80cm long, possibly a little more.

Glaze the length of it with the egg was, and sprinkle with the seeds and a little salt to finish.

To divide into 12 good size rolls, find the middle and cut right through. Then find the middle of those to pieces, and cut right through. Now you’ve got four pieces, and you divide each of those pieces into three.

Line a baking tray with baking paper (the tray I used was 40 cm by 27 cm and it all fitted perfectly). Gently place the rolls on the paper evenly, most likely three rows of four. Then place in a preheated oven at 180º C for 40 minutes, turning the tray about halfway through.

When they’re golden brown, remove the tray from the oven and use tongs to move the rolls to a wire rack to rest. This help the bottoms get crispy.

After about 10 minutes, they’re ready to serve.

Yields 12 rolls (serve two with veggies for dinner or one with salad for lunch)

Sunday, January 13, 2019

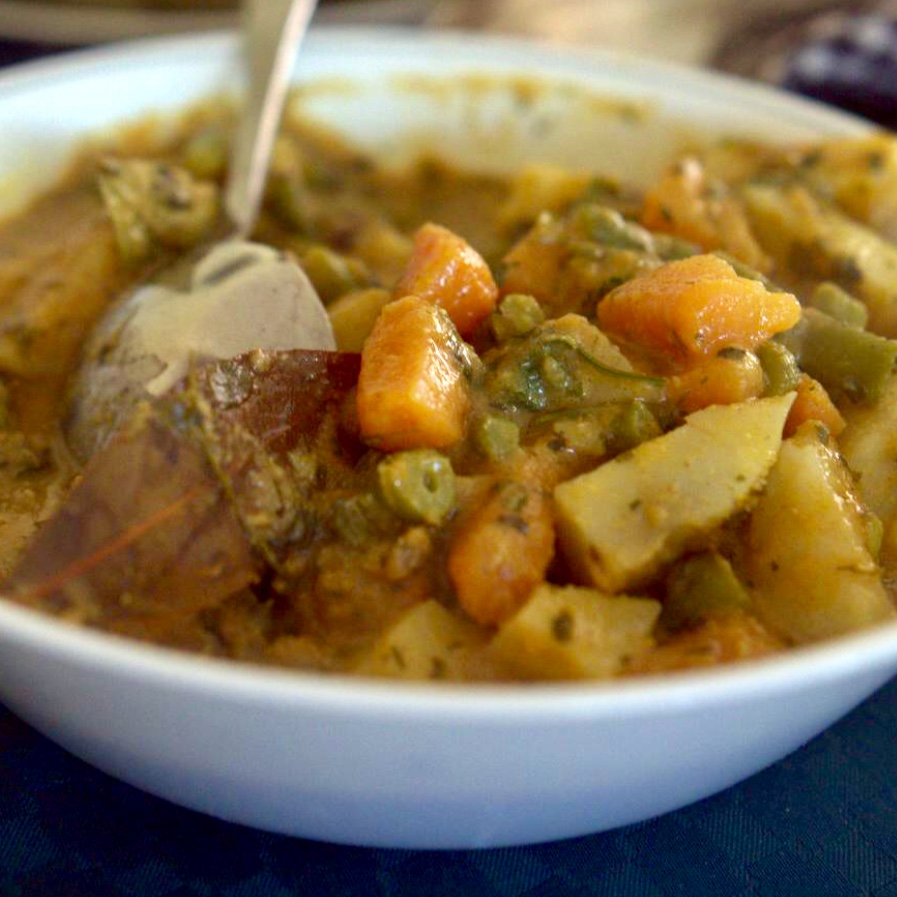
Punjabi chicken curry

This is based on a recipe given to me by a work friend and belonging to her mother. All up, it takes about half an hour, and it’s delicious! For vegetarian (see image from my work buddy) - just leave out the chicken. You can also leave out the chicken if you’re using it as a side dish for an Indian feast!

Ingredients

  • Fresh ginger (about 2cm cube)
  • 1 tomato
  • 3 eschallots
  • 3 whole dried chilies (more or less to taste)
  • 6 curry leaves
  • 2 tablespoons slivered almonds
  • 1 tablespoon crush garlic
  • 1 teaspoon fenugreek seeds
  • 1 teaspoon black poppy seeds
  • 1 teaspoon cumin seeds
  • 1 teaspoon black pepper corns
  • 1 teaspoon turmeric powder
  • 2 teaspoons garam masala
  • 3 bay leaves
  • 2 chicken thigh fillets
  • 1 medium potato
  • 1/3 of a medium sweet potato
  • 1 cup green beans cut into 3cm lengths (if using snake beans cut into 1cm lengths)
  • Juice of half a lemon
  • Salt to taste
  • 2 tablespoons peanut oil

Method

It looks complicated at first, but basically it is just - prepare a whole bunch of ingredients and mix them together in four stages. The prep time is a bit more than 15, the assembly about less than 15.

If your pantry doesn’t have the spices in the list - a quick trip to your local Asian grocer will reward you for many months to come!

Preparation

  • Put the tomato in a bowl, cut around and remove the stalk end, and microwave on high for 3 minutes. Remove to cool
  • Peel the potato and sweet potato and cut into 1cm cubes. Top and tail the beans and cut as described above
  • Place veggies in a bowl with a pinch of salt, a squeeze of lemon juice and the bay leaves. Cover and cook in microwave of high for 10 minutes, removing to mix up the ingredients about halfway through. While this is cooking, get on with the rest of the assembly. Once the veggies are done, just remove from the microwave and set aside still covered. Don’t uncover - the fragrance of the veggies and bay is just flavour lost
  • Chop the ginger into smaller chunks and pound in a mortar with a little water until it’s part chunky part pasty. Set aside
  • Heat oil in a frying pan on medium heat and add the eschallots, pealed and cut into 2 cm chunks. Cook until the begin to brown and soften
  • Once the tomato is done you will be able to easily remove the skin with tongs or a fork (or your fingers if you let it cool enough). The flesh and juices should have pretty much collapsed together by now, so just give it a quick whisk with a fork and set aside
  • Once the eschallots have softened, pound them in a mortar until they are part chunky, part pasty
  • Slice chicken fillets about 3cm by 1cm

Assembly

And now it’s action stations…

  1. Bring the pan you used for the eschallots back to medium heat, add chilies, cumin, poppy seeds, fenugreek seeds, curry leaves, almonds and pepper corns. Once the seeds start to pop and the almonds begin to brown, add the crushed garlic and eschallot paste. Stir through and cook for 2 minutes
  2. Add chicken to pan, and stir though. The the flesh will collect all the spices and the aromas will be heavenly. Turn up the heat so the chicken browns at the edges. About 2 minutes
  3. Add the turmeric, garam masala and tomato. Reduce heat and stir through and cook another 5 minutes
  4. Add the veggies, stir though, and cook for 10 minutes

Garnish with coriander leaves and lemon slices. Serve with rotis or rice.

Serves 4

Monday, December 24, 2018

Olive and basil focaccia

This is very much a “day at home” thing as the dough requires three rises of about 45 minutes. But it’s basically: mix the dough, roll it out about three hours later, smash and apply the topping ingredients, put in the oven. Just think of all the washing and action-movie watching you can do in the meantime!

About the flour - regular, all-purpose flour has about 8% protein. Bread-making, or strong, flour has 12% or more. Think of the wheat protein (gluten) as the scaffolding of your bread. Once you get the bread to rise, the scaffolding will hold the shape so it remains soft and fluffy and doesn’t collapse back down.

Ingredients

Bread

  • 600g bread-making flour
  • 360g filtered water
  • 1 sachet dry yeast (7 grams)
  • 1 tsp salt
  • 2 tbsp extra virgin olive oil

Topping

  • Handful fresh basil leaves
  • .25 cup extra virgin olive oil
  • 3 cloves garlic
  • 4 pitted kalamata olives

Method

In a mixing bowl, combine the bread ingredients. Kneed just enough to combine the ingredients into a consistent ball of dough. Cover with damp tea towel and set aside in warm place (or in the oven at 40ºC) for 45 minutes.

Now it will have doubled in size. Wet your working surface, and with wet hands stretch and fold the dough four or five times. Cover, and set aside in a warm place for another 45 minutes.

A good size baking pan for this is 20cm wide by 30cm long and at least 5cm deep.

Oil the pan bottom and sides.

Smash the topping ingredients using a mortar and pestle.

Now dry and lightly flour your working surface. With a rolling pin, shape the dough to match, more or less, the shape of you baking tin.

Place in the tin and push and stretch the dough to reach the sides of the tin, then and cover with the topping, smoothing across evenly with the back of a spoon. Now you want to make little indentations in the dough for texture. You do this with the fingers of both hands, like you’re playing the piano, working all the way down from the far side to the near side.

Cover again and return to warm place for another 45 mins.

Remove from oven (if this is your warm place) and crank up the heat to 200ºC. Once the temperature is reached, remove the damp towel and place the tin in the oven.

After 12 minutes, turn it around for more even browning and bake for another 12 minutes.

Once done, it needs to rest on a wire rack so the bottom doesn’t get soggy. To safely remove it from the hot tin, use the double-wire-rack flip technique.

Place the hot baking tin on a wire rack. Put another rack on top. Hold the two racks together with the tin in the middle, and flip. Take off the top wire rack and carefully remove the upside down hot tin. The bottom of the loaf will now be revealed, all golden brown. Put the wire rack upside down on top, and flip again.

And there it is - resting on a wire rack.

Before serving, sprinkle with grated Parmesan and a drizzle of extra virgin olive oil.

Sunday, December 23, 2018

Eve’s pudding

I’m not a big maker or consumer of desserts, but this one is simple and delicious - and also great for breakfast!

Ingredients

  • 1.5 cups self-raising flour
  • 1 teaspoon brown sugar
  • 2 teaspoons caster sugar
  • Juice of one lemon
  • 1 cup canola or sunflower oil (not olive oil, the taste is too strong)
  • 6 medium Granny Smith apples
  • .25 cup currants
  • 4 eggs
  • 1tsp baking powder
  • 1 tsp salt
  • 1 tsp vanilla extract
  • 1tsp each ground cinnamon and ground nutmeg
  • 60g butter, cubed

Method

  1. Peel, core and slice apples
  2. Place apple slices in a baking tray or casserole dish and toss in brown sugar, lemon juice, cinnamon, nutmeg and currants
  3. Evenly distribute contents in the dish, and add butter cubes evenly
  4. Preheat oven to 160º C
  5. Break eggs into a mixing bowl and whisk. Add oil and whisk again. Then whisk in vanilla, caster sugar. Finally add the flour, salt and baking powder. Combine with whisk until it is a smooth batter.
  6. Pour batter over the apple mixture and spread it over evenly.
  7. Place in the oven and cook for 50 minutes
  8. Serve warm or cold with custard

Saturday, March 24, 2018

Last of the summer pork

I expected to have my kids this weekend (they are now teenagers and gigantic), but no. So it is slow cooker therapy for this bachelor dad!

I looked in my fruit bowl, I looked in my garden, I looked in my pantry and fridge - and came up with this - slow cooked fruity pork.

Ingredients

  • 1kg diced pork
  • 1 onion roughly chopped
  • 2 cloves garlic, minced
  • 2 tablespoons tomato paste
  • 2 tablespoons Worcestershire sauce
  • 2 tablespoons light soy sauce
  • 3 tablespoons brown sugar
  • 3 small plums halved and pitted
  • 1 lime sliced
  • 3 cardamom pods, crushed
  • Ground pepper to taste
  • 3 tablespoons olive oil

Method

Use a slow cooker or a heavy based casserole dish with a well-fitting lid. I used my trusty slowy.

In the slow cooker place all the ingredients except the pork onion, and olive oil.

In a frying pan, bring the oil to a frying heat and fry the pork in small batches. You need space around each piece so that the juices evaporate quickly and you get lovely brown bits on the edges. Remove each batch to the slow cooker.

Once you’ve finished the pork, drop the heat to low and add the onion. Once again it’s brown at the edges you are looking for, and you cook until it’s half translucent.

Remove to the slow cooker, making sure you scrape up all the yummy brown bits with a wooden spoon.

I have my cooker set on auto, which does what you want - bring slowly to a high simmer, then drop to a regular one.

In a casserole dish, cook covered for 2–3 hours. In a slow cooker 6.

I would like to say I chose green chillies so that their bitterness would offset the sweetness of the fruit and sugar. It’s just that my chillies out back are green!

However bitterness does offset sweetness.

Bachelor dad, signing off.

Sunday, January 28, 2018

Soup - short and long

Just spent a week or so with my teenage boys. The eldest (now seriously teen garbage guts) said the food I make that he can eat “infinite” amounts of are chunky beef cottage pie, spaghetti bolognese, roast butterflied chicken, homemade pizza. To which we can now add last night’s chicken, corn and won ton soup.

I’ve enjoyed cooking for my guys, and there is a lot of hype around food and food rituals and how important it is. But amongst the worry and fuss about food as metaphor, you forget the literal - food keeps you alive. Eating good, healthy food guarantees nothing - except that things would be worse if you didn’t.

Back to the soup… You can do this with a small tin of creamed corn and a larger one of corn kernels. But fresh corn is easy to come by, and cooking the corn gives you a flavoursome soup base from which to build.

Here we go.

Ingredients

  • 3 sweet corn cobs
  • 3 chicken thigh fillets
  • 1 225g pack frozen won tons
  • 2 handfuls fresh rice noodles
  • 2 cups chicken of vegetable stock
  • 4 cups water
  • 2 teaspoons five spice powder
  • 2 teaspoons onion powder
  • 1 teaspoon white pepper
  • 1 tablespoon peanut oil
  • 4 tablespoons light soy sauce
  • 3 tablespoons chopped shallots to garnish

Method

Remove husks and silk from corn. Trim stalk and tip. Place in saucepan just big enough to hold them, and the water and bring to boil uncovered.

Heat a fry pan with peanut oil to medium. Flatten out thigh fillets and fry one at a time, five minutes each side. Remove to a plate, and cover - including any pan juices for the final fillet.

Once the corn comes to the boil, continue boiling for another five minutes, then remove corn to a plate to cool.

Keep the water boiling until reduced by a third. Add stock, five spice, onion powder, pepper and soy sauce and, once it comes back to boil, reduce to simmer.

Take one corn cob and with a sharp knife slice the kernels off the cob. Pound using a mortar and pestle to a coarse mash. Add to the saucepan. Slice down the other two corns and put the kernels directly into the pan.

You’re not done with the cobs yet. Take each cob and, using a butter knife, scrape down the cob, held over the saucepan, so that the starchy juices are harvested for the soup.

Now coarsely chop the chicken a place in the saucepan along with the juices that have developed.

Turn up the heat until boiling, then add the won tons, continuing on high until boiling resumes.

Add rice noodles and boil for two minutes. Remove from heat.

Serve in generous bowls, garnished with shallots.

Sunday, October 29, 2017

Beef and rice noodle soup

My non-spicy son was off with buddies watching Thor part three, so I thought I’d treat my spicy son with a new dish.

Pretty much improvised, it worked out well. So here it is.

Ingredients

  • 1 round steak
  • 2 cups beef stock (or vegetable stock, or water if you’re caught short)
  • 1 lemon, juiced
  • 1 teaspoon five spice powder
  • .25 cup chopped shallots
  • 1 tablespoon chopped lemon grass stem
  • 1 tablespoon chopped galangal root
  • 2 cups frozen veggies
  • 1 tablespoon Xo sauce
  • 2 tablespoons light soy sauce
  • 3 birdseye chillies, chopped
  • 1 clove garlic, crushed
  • 4 tablespoons peanut oil
  • Rice noodles

Method

This is a very quick dish too assemble - all you have to do is cut the beef into rectangular slabs and pop them in the freezer about three hours ahead of time.

So - take the round steak and cut it into rectangles, removing fat and connecting tissue. You are going to slice it thinly across the grain, so you want each piece no more than 4 cm wide. Lay them flat in one layer in a plastic bag and put in the freezer for three hours. You are aiming at firm, but not hard. This will enable you to slice the beef more thinly.

Once the beef is the right consistency, slice it thinly across the grain and marinate in lemon and five spice powder.

Sauté lemongrass, galangal, garlic, chilli and shallots on low-medium heat for about 10 minutes. Stir in Xo sauce.

In a new saucepan, put on water to boil.

In the soup pan, add stock, and bring to boil. Add soy sauce to taste.

Zap veggies in the microwave.

Add noodles to the boiling water. Toss sliced beef and juices into the soup pan. Beef will cook almost immediately. Add the veggies. And you are done.

Once the noodles are tender, drain, divide into bowls, and ladle over with soup.

Thursday, October 5, 2017

Spanish omelette

A Spanish omelette is a great breakfast or snack. It keeps well in the fridge and is very good out-on-the-boat food.

This recipe basically follows this one on YouTube: https://youtu.be/JceGMNG7rpU  Tortilla de Patatas by Omar Allibhoy

I use desiree potatoes, washed but not peeled, and I slice both the onion and potatoes using a V-slicer with the “thick slice” attachment, then cut the bigger slices and onion rings in half.

Ingredients


  • 1 medium onion, thinly sliced
  • 3 medium potatoes, thinly sliced
  • 6 eggs
  • 2 cups olive oil
  • Salt, pepper, ground cumin

Method

Heat oil in heavy-based frying pan.

When oil is hot, add onion.

Once onion begins to brown, add potatoes.

Once potatoes begin to brown at the edges remove from heat. Using a slotted spoon, remove the onion and potatoes to a bowl. Break eggs into the bowl, add seasoning and stir through the mixture. Cover and let rest for 15 minutes.

Once you’ve let the oil cool, pour off and strain, and keeping for reuse.

Give the pan a wipe with a paper towel. Return enough oil to just cover the pan - not too much as we will be flipping this over and we don’t want to be burned by hot oil.

Once the pan is hot again, pour in the mixture and push evenly to the sides of the pan.

Cook on high for 1 minute, then on low for 2 minutes - I use a cast iron pan, so I actually take it right off the heat.

The way you flip it is to put a wide plate over the pan - the plate needs to extend at least a centimetre beyond the edge. If you don’t have a big enough plate, try a pizza tray. So, placing the plate face down over the pan, and pressing down, turn upside down and lift the pan away. There is your first cooked half. If should be a little dark in places, but mostly golden or brown.

Add a little more oil if necessary, raise heat again, then slide the uncooked side into the pan. Again, 1 minute on high, 2 minutes low.

Remove from pan using the same flip method.